Table of Contents
- The Chat
- The Dynamic Field Contact with Data
- The Dynamic Field Database
- The Dynamic Field Web Service
- Import Ready2Adopt Process
- Import Ready2Adopt Web Services
- SMS Notifications and Notification Web View
- The Report Generator
- Resource Planning
- The SLA Field Selection Dialog
- SMS Communication Channel
- The Article Attachment Overview
- The Ticket Timeline View
- System Configuration User Specific Settings
- System Configuration History
The chat feature of OTRS Business Solution™ allows for chats between agents and customers using the OTRS frontend. Once enabled, customers (or public users) can start chats with agents and vice versa. Finished chats can be archived and attached to tickets, or can be downloaded as PDF by agents, customers and public users.
Each chat is assigned to a chat channel. Chat channels are like chat rooms. Each chat channel is assigned to a certain group which controls the permissions for this channel. If no chat channel is selected when a chat is created, this chat will be created in a default channel (which is automatically created if it doesn't exist).
The following system configuration options are relevant for this feature. Please note that you can also define a list of fixed texts which are being displayed to public users and customers in the chat module. For more information on which texts can be changed, please have a look at the module configuration (OTRSBusiness → Core::Chat).
ChatEngine::ActiveControls whether or not the chat feature is enabled.
ChatEngine::ChatDirection::PublicToAgentControls whether or not public users should be able to start chats (please note that the frontend module configuration for the public chat frontend in
PublicFrontend::Module###PublicChathas to be enabled, too).ChatEngine::ChatDirection::CustomerToAgentControls whether or not customers should be able to start chats (please note that the frontend module configuration for the customer chat frontend in
CustomerFrontend::Module###CustomerChathas to be enabled, too).ChatEngine::ChatDirection::AgentToCustomerControls whether or not agents should be able to start chats with customers directly.
ChatEngine::ChatDirection::AgentToAgentControls whether or not agents should be able chat with each other.
ChatEngine::PermissionGroup::ChatReceivingAgents,ChatEngine::PermissionGroup::ChatNotificationAgents,ChatEngine::PermissionGroup::ChatStartingAgentsDefines groups for the certain features. Receiving: Groups which can receive and accept chat requests. Notification: Groups which can receive notifications about new/pending chat requests. Starting: Groups which are allowed to start new chats at all.
ChatEngine::DefaultAgentNameA default name which should be displayed to customers and public users instead of the real name of the chatting agents. If empty or disabled, the real agent name will be shown.
ChatEngine::DefaultAgentNameNumbersControls whether or not numbers should be added to the agents default name in case more than one agent is in a chat to allow customers/public users to distinguish between the different agents (e.g. "Support Agent 1", "Support Agent 2" etc.).
ChatEngine::PublicInterface::AllowChatChannelsDefines, if chat channel selection should be enabled for public users. If set to "no", chats from public users will go to the default channel automatically (ChatEngine::DefaultChatChannel).
ChatEngine::PublicInterface::AvailabilityCheckDefines, if chat channels should only be selectable in the public interface if at least one agent with sufficient permissions is available in this channel.
ChatEngine::CustomerInterface::AllowChatChannelsDefines, if chat channel selection should be enabled for customer users. If set to "no", chats from customer users will go to the default channel automatically (
ChatEngine::DefaultChatChannel).ChatEngine::CustomerInterface::AvailabilityCheckDefines, if chat channels should only be selectable in the customer interface if at least one agent with sufficient permissions is available in this channel.
ChatEngine::CustomerThresholdAmount of minutes which need to pass before a no agent is available message is being displayed to the customer/public user who started the chat request. The message can be configured using
ChatEngine::Texts::CustomerFrontend::NoAgentsAvailable::NewTicketorChatEngine::Texts::CustomerFrontend::NoAgentsAvailable::AddToExisiting(customer interface) andChatEngine::Texts::PublicFrontend::NoAgentsAvailable(public interface).ChatEngine::AgentOnlineThresholdIf an agent is not active in OTRS within this threshold, they will be automatically set to unavailable for chat (see Agents: Set up availability).
ChatEngine::DefaultChatChannelName of the default chat channel. This channel must not be created manually and can't be deleted. This channel is taken as target chat channel in case chat channel selection is disabled for any interface.
ChatEngine::ChatTTLAfter how many hours a closed chat should be deleted from the database. Closed chats can still be viewed and downloaded by customers. After a chat has been deleted from the database, it will no longer be possible for customers to view or download it.
ChatEngine::ChatDecayTimeAfter how many days chats which are not closed should be deleted from the database automatically in order to keep the database clean. Please note that this setting can possibly delete chats which are still in use if they are older than the configured amount of days.
ChatEngine::ChatOrderDefines, if new chats should be prepended or appended to the list of active chats in the active chats widget in the chat manager.
In order to be able to create your first chat, you need to setup certain things in your OTRS instance.
In the admin area in OTRS, you'll find a new entry Chat Channel (AdminChatChannel). Use this screen to add new channels. You'll need to assign an existing agent group to each channel you'll create. You can use the screens Agents ↔ Groups or Agents ↔ Roles to assign permissions. There are new chat-specific permissions which are described below.
Available Chat Permissions
CHAT_OBSERVERUsers with this permission type will only be able to observe chats in this channel after they have been invited to them. They will not be able to accept or observe chats in this channel on their own and if they are the only agents currently available in this channel, customers/public users will not be able to create a new chat in this channel. Observers can still invite other agents to a chat they currently observe.
CHAT_PARTICIPANTUsers with this permission type will be able to take part in a chat, but only after they get invited to it. After they're in a chat, they can change the chat channel, discard the chat etc. They will not be able to accept a customer/public user chat request on their own.
CHAT_OWNERUsers with this permission type will be able to accept chat customer/public requests and do all kinds of observer and participant actions on a chat.
Note
To use the chat in general, agents still need to have at least ro permissions to the groups set up in ChatEngine::PermissionGroup::ChatReceivingAgents and ChatEngine::PermissionGroup::ChatStartingAgents.

As an agent, you'll need to select in which chat channels you want to be available. Customers will only be able to create a new chat request on a certain channel if at least one agent with owner permissions has selected this channel in their preferences and is set as available for external chats (see next section).

To be available for any chats, you'll need to use the chat toolbar switch. It's a three-way switch with these states: unavailable for chats (empty circle), available for internal (agent-to-agent) chats (empty circle with tick sign), available for internal and external (customer-to-agent, public-to-agent) chats (filled circle with tick sign). Just click the toggle in order to change your availability.
Note
Your availability will be reset to internal chats only each time you log in to OTRS again.
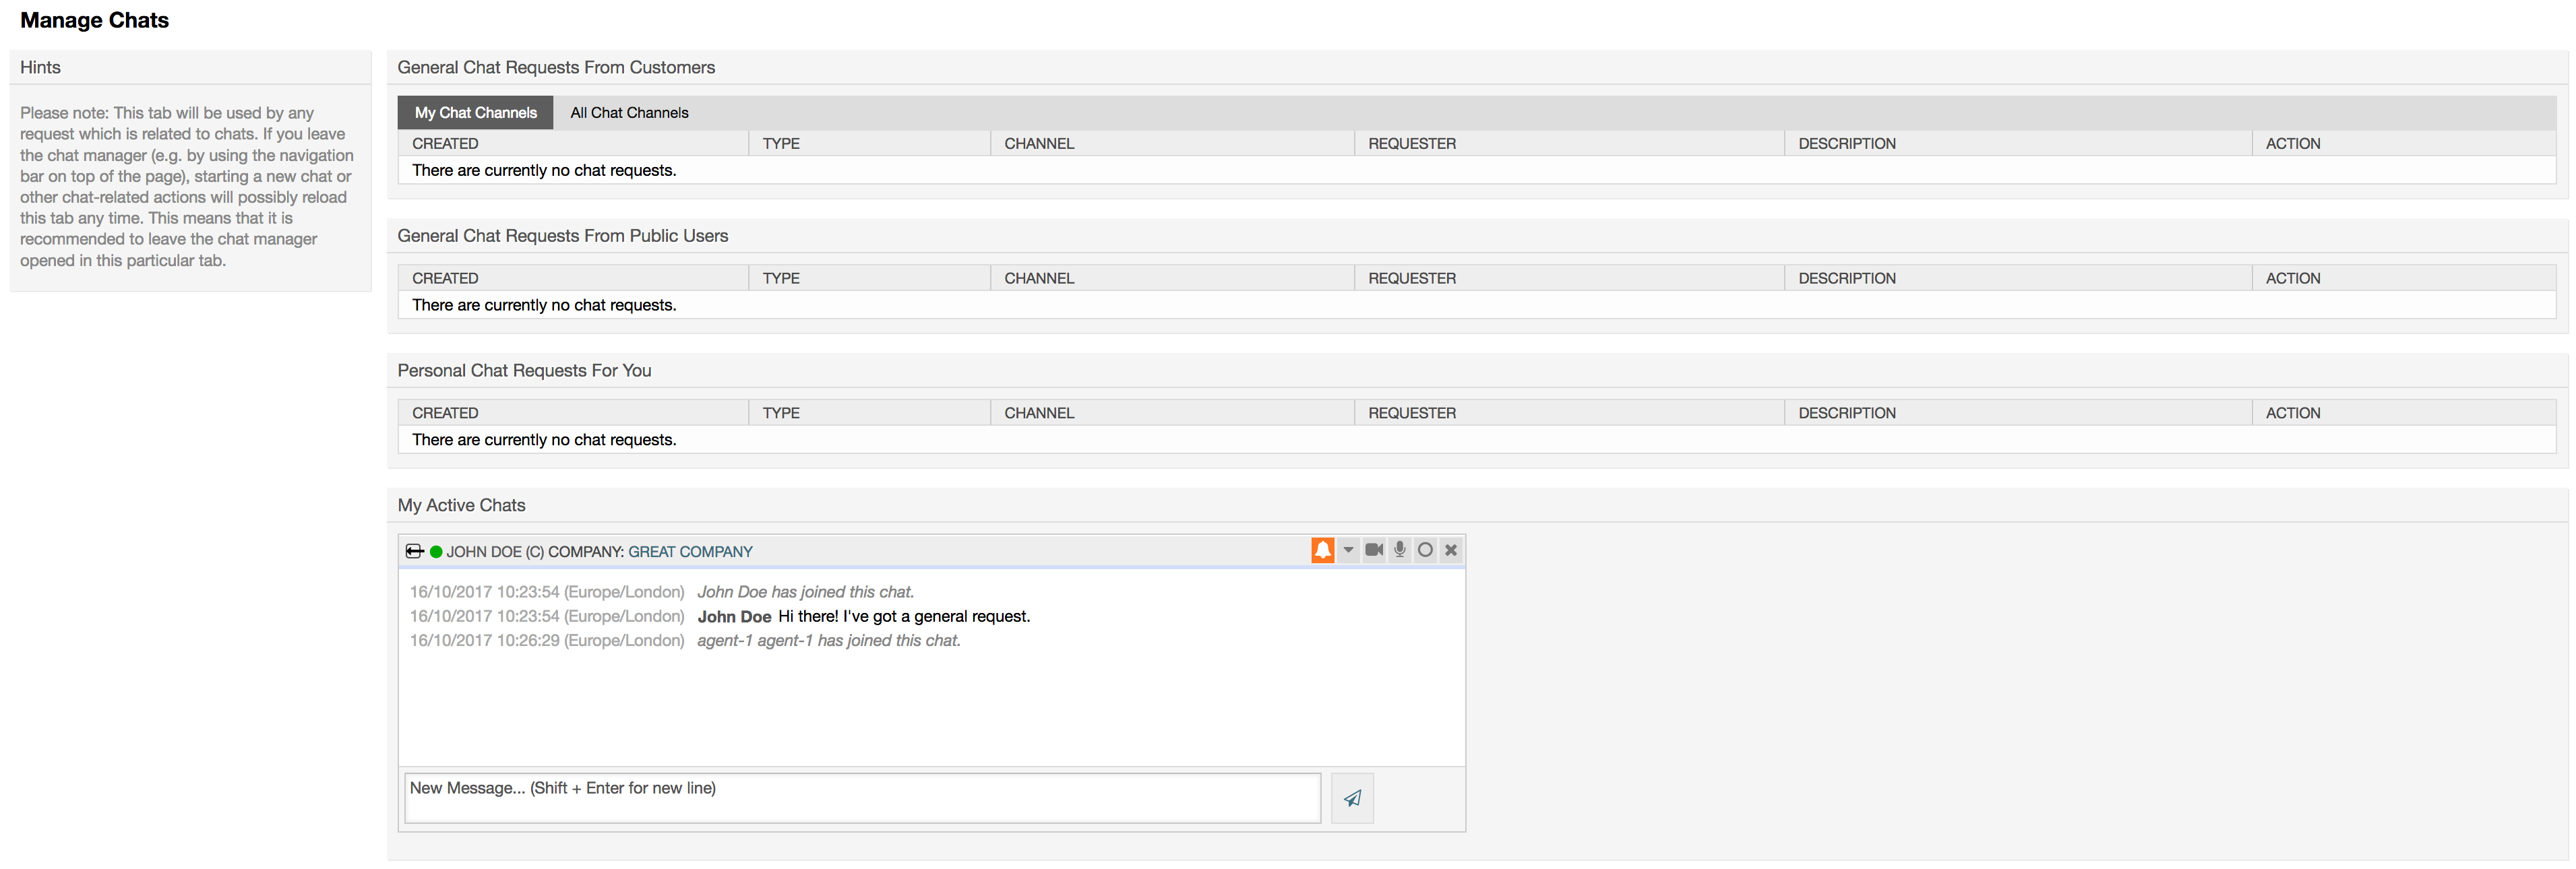
The chat manager is the central point of the chat feature. As an agent, here you can manage your chats and see and accept open requests. The chat manager provides a list of chat requests from customers, public users and other agents, as well as an overview over all active chats. Open the chat manager by using Chat in the main navigation of OTRS.
Agent to agent
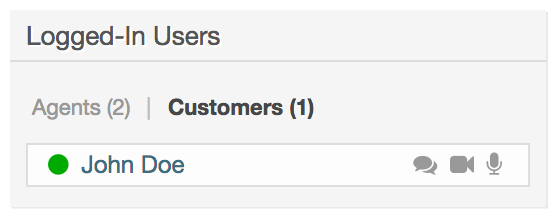
To start a chat with another agent, you can use the user online widget from the dashboard. Agents who are able to use the chat, will have a chat icon next to their name which you can click on. Once clicked, a chat form will open which you can use to enter your first chat message to this agent. After the chat request has been sent to the other agent, you can watch the chat in the chat manager.
Agent to customer
To start a chat with a customer, you can use the customer user widget from the customer information center when viewing a certain customer. Online customers will have a chat icon next to their name which you can click on. Once clicked, a chat form will open which you can use to enter your first chat message to this customer user. After the chat request has been sent to the customer, you can watch the chat in the chat manager.
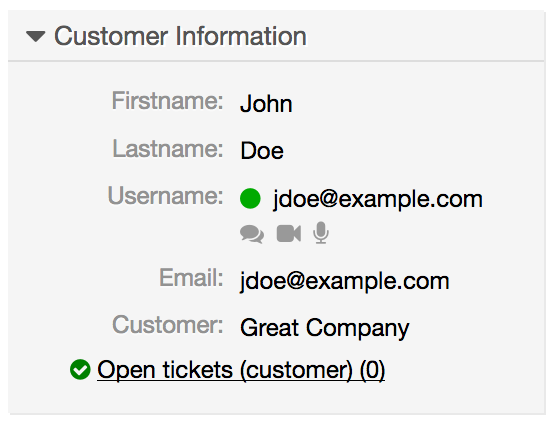
Another possibility is to create a chat from the ticket zoom. If the customer user who is selected in this ticket is currently online, you'll be able to use a chat icon next to their username in the customer information box in right sidebar (see figure below).
Additionally, you will be able to start chat with customer users by clicking on chat icons next to their name in the user online widget on the dashboard.
Customer to agent
Customers are not able to start a chat directly with a certain agent, but only to create generic chat requests. To do this, customers can use the item Chats → Create new chat from the customer interface main navigation.
Public to agent
Users of the public interface are also not able to start a chat directly with a certain agent, but only to create generic chat requests using the public chat module (
public.pl?Action=PublicChat). If you would like to integrate the public chat module into your website, you can use the IsIframe parameter. The OTRS header and footer will then be removed from the view (public.pl?Action=PublicChat;IsIframe=1).

If there is a new chat request in one of the channels you (as an agent) have permissions for, you'll receive a browser notification which allows you to go directly to the chat manager. After you've opened the chat manager, you can see a list of open requests of all types (see figure below).

Use the Open chat button from the list to see the details of the request. Clicking the button will open an overlay which provides several actions on this request. Given that you've got sufficient permissions, you can accept the request or change the channel for this request. Changing the channel will follow the same rules as creating new request: you can only move the request to a channel which has active agents in it.
Changing the chat channel without accepting the request could be used to dispatch chats to the right department for example.
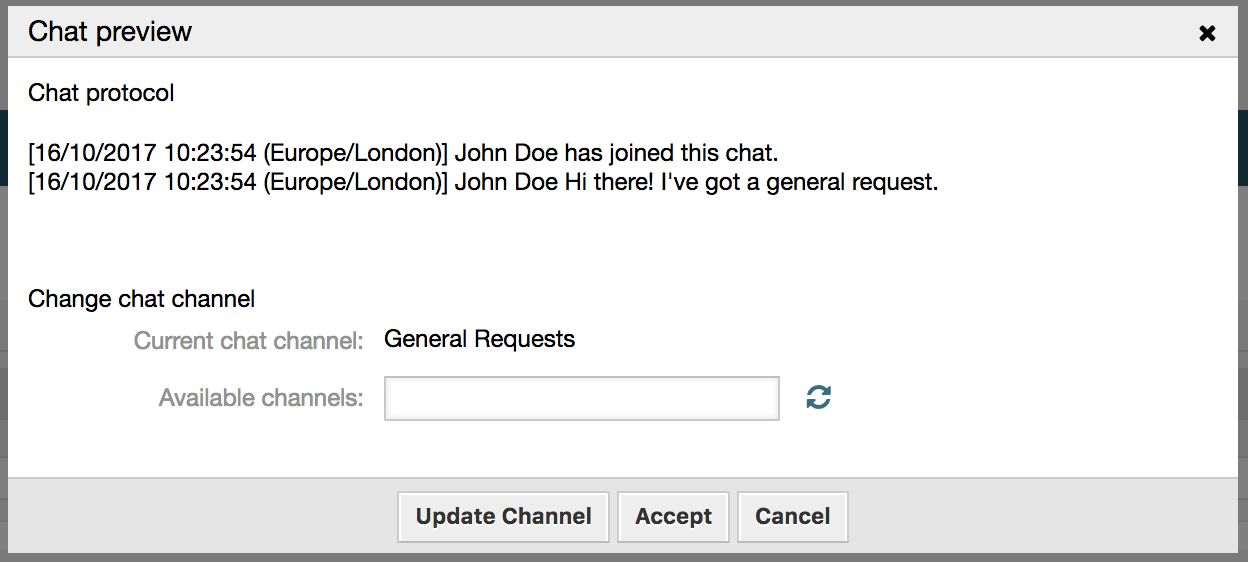
If you want to enter a chat, you can use the Accept button from the chat detail overlay box. The chat will then be removed from the list of requests, added to the list of your active chats and the customer/public user will receive a message that you've entered the chat.
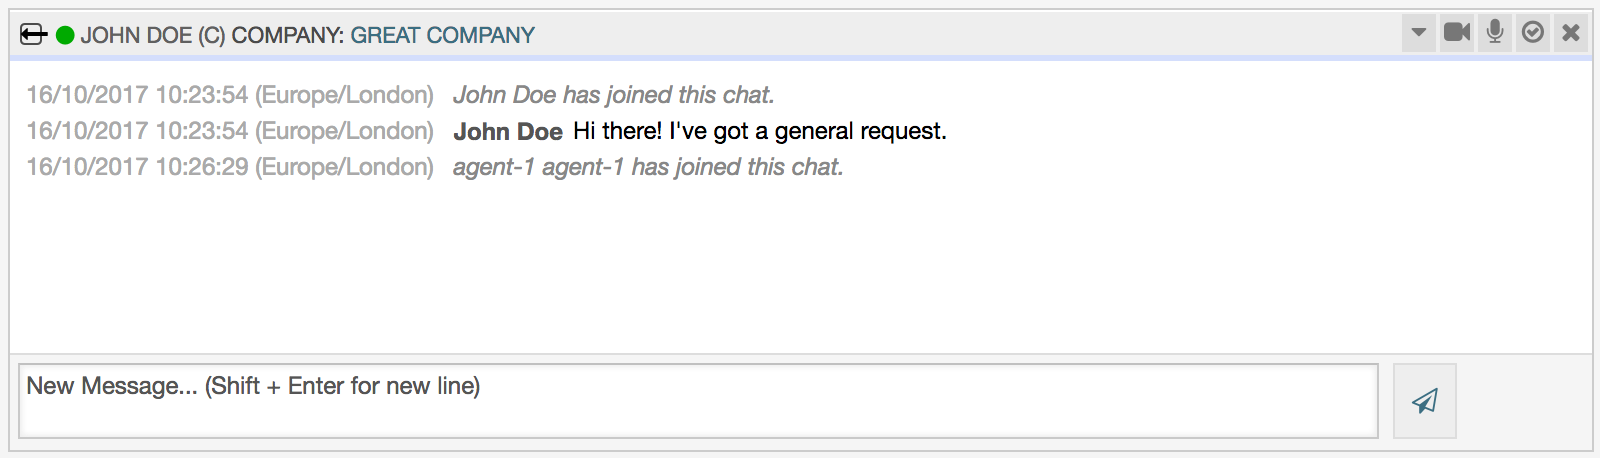
The chat widget is the main component you'll use when chatting with other people. It provides a history of all messages in the chat as well as list of possible actions (depending on your permission level).
To send messages, you can use the text field in the chat widget in your list of active chats. Once you are done with typing your message, submit it by either clicking the send icon next to the text field, or using tab and enter (consecutively). When the message has been sent, the cursor will jump back to the text field to allow for easily continuing to type.
Following you'll find a list of possible actions in the chat widget.
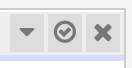
Action: Monitor & close
From the chat widget head top right hand side, you can close the chat by clicking the "x" icon. Clicking the circle icon right next to the close icon, allows you to set up a personal monitoring for this chat, which is again a three-way switch (no monitoring = empty circle, only monitor customer activity = empty circle with tick icon, monitor all actions = filled circle with tick icon). When monitoring a chat, browser notifications will show up each time there is a new action in this chat.
Also from the header, you can expand a toolbar of advanced chat actions for this chat using the triangle icon. The toolbar also shows you the channel this chat takes place in and which role you have in this chat (e.g. Owner).
Action: Phone ticket
Using the Phone ticket link from the advanced toolbar, allows you to create a phone ticket to which the current chat will be appended to as an article. After you've successfully created the ticket, the chat will get closed automatically.
Action: Append
Allows you to append this chat as an article to a selected ticket. After the article has been created, the chat will get closed automatically.
Action: Invite
Allows you to invite another agent to this chat. You can select from a list of available agents who you want to invite. Once you've invited the agent, a new agent-to-agent chat request will be sent to this agent. After the request has accepted, a new internal chat will be established between you and the invited agent. In this internal chat, the invited agent has two more actions available in the advanced actions toolbar: Observer and Participant.
Action: Channel change
Using this link, you can change the channel for this chat. For the selection of the target channel the same rules apply as for initially selecting a chat channel.
Action: Download
Lets you download the complete history of this chat as PDF.
Action: New window
Opens this chat in a separate popup window. You can use this window in the same way as the chat widget and both the widget and the popup can be used at the same time.
When you have been invited to a chat by another agent, you can decide if you want to join the chat as observer or participant (depending on your permission level). Once you click the action from your toolbar, a new chat widget will be added to the list of your active chats which is the chat you have been invited to. If you join the chat as observer, you will only be able to read what others are contributing to the chat and you will be invisible to customers or public users. Agents will still receive a message that you joined the chat as observer. As an observer, you have the possibility to become a participant anytime by using the advanced action toolbar in your chat widget (depending on your permission level).
If you want to contribute something to the chat you have been invited to, you can join it as a participant. Customers/public users and agents will receive a message that you have entered the chat. As a participant, you can become an observer anytime by using the advanced action toolbar in your chat widget.

Every chat participant has colored icon (circle) before his/her name in the Chat widget header, which represents participant availability. Icon color represents participant state as follows:
 Active - participant is active (available and online).
 Away - participant is away (available, but there was no request sent to the server from this user for some time -
default 5 minutes, see ChatEngine::AgentOnlineThreshold).
Away - participant is away (available, but there was no request sent to the server from this user for some time -
default 5 minutes, see ChatEngine::AgentOnlineThreshold).
 Inactive - participant is inactive (chat request is not accepted yet or participant left the chat).
 Unavailable - participant is unavailable (set via Availability button).
 Offline - participant has logout or session has expired.
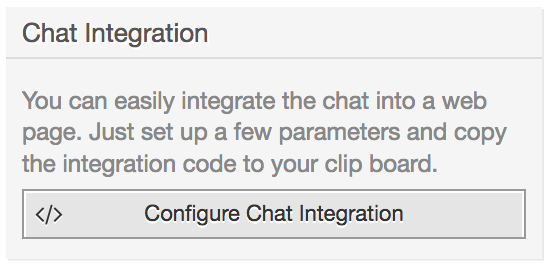
You can easily integrate the public chat into a website. In the chat manager, administrators can access a button to open public chat integration configuration and snippet generator.
Configuration tab contains several parameters that can be tweaked to suit your needs. While most of them are self-explanatory, General Settings section contains several important options:
- Display Chat if no agent is available
If enabled, this option controls whether the chat will be displayed regardless of agent's presence in the system. If not enabled, if there are no agents currently online and available for chat, widget will be hidden.
- Fall-back URL
This option is taken into account only if above option is enabled. If there are no agents present and after some time, users of the public chat will be presented with a message containing this link.
- Pre-selected channel
Default chat channel selection for public chat requests. This chat channel will be pre-selected in the chat widget, but users will be able to change it if needed.
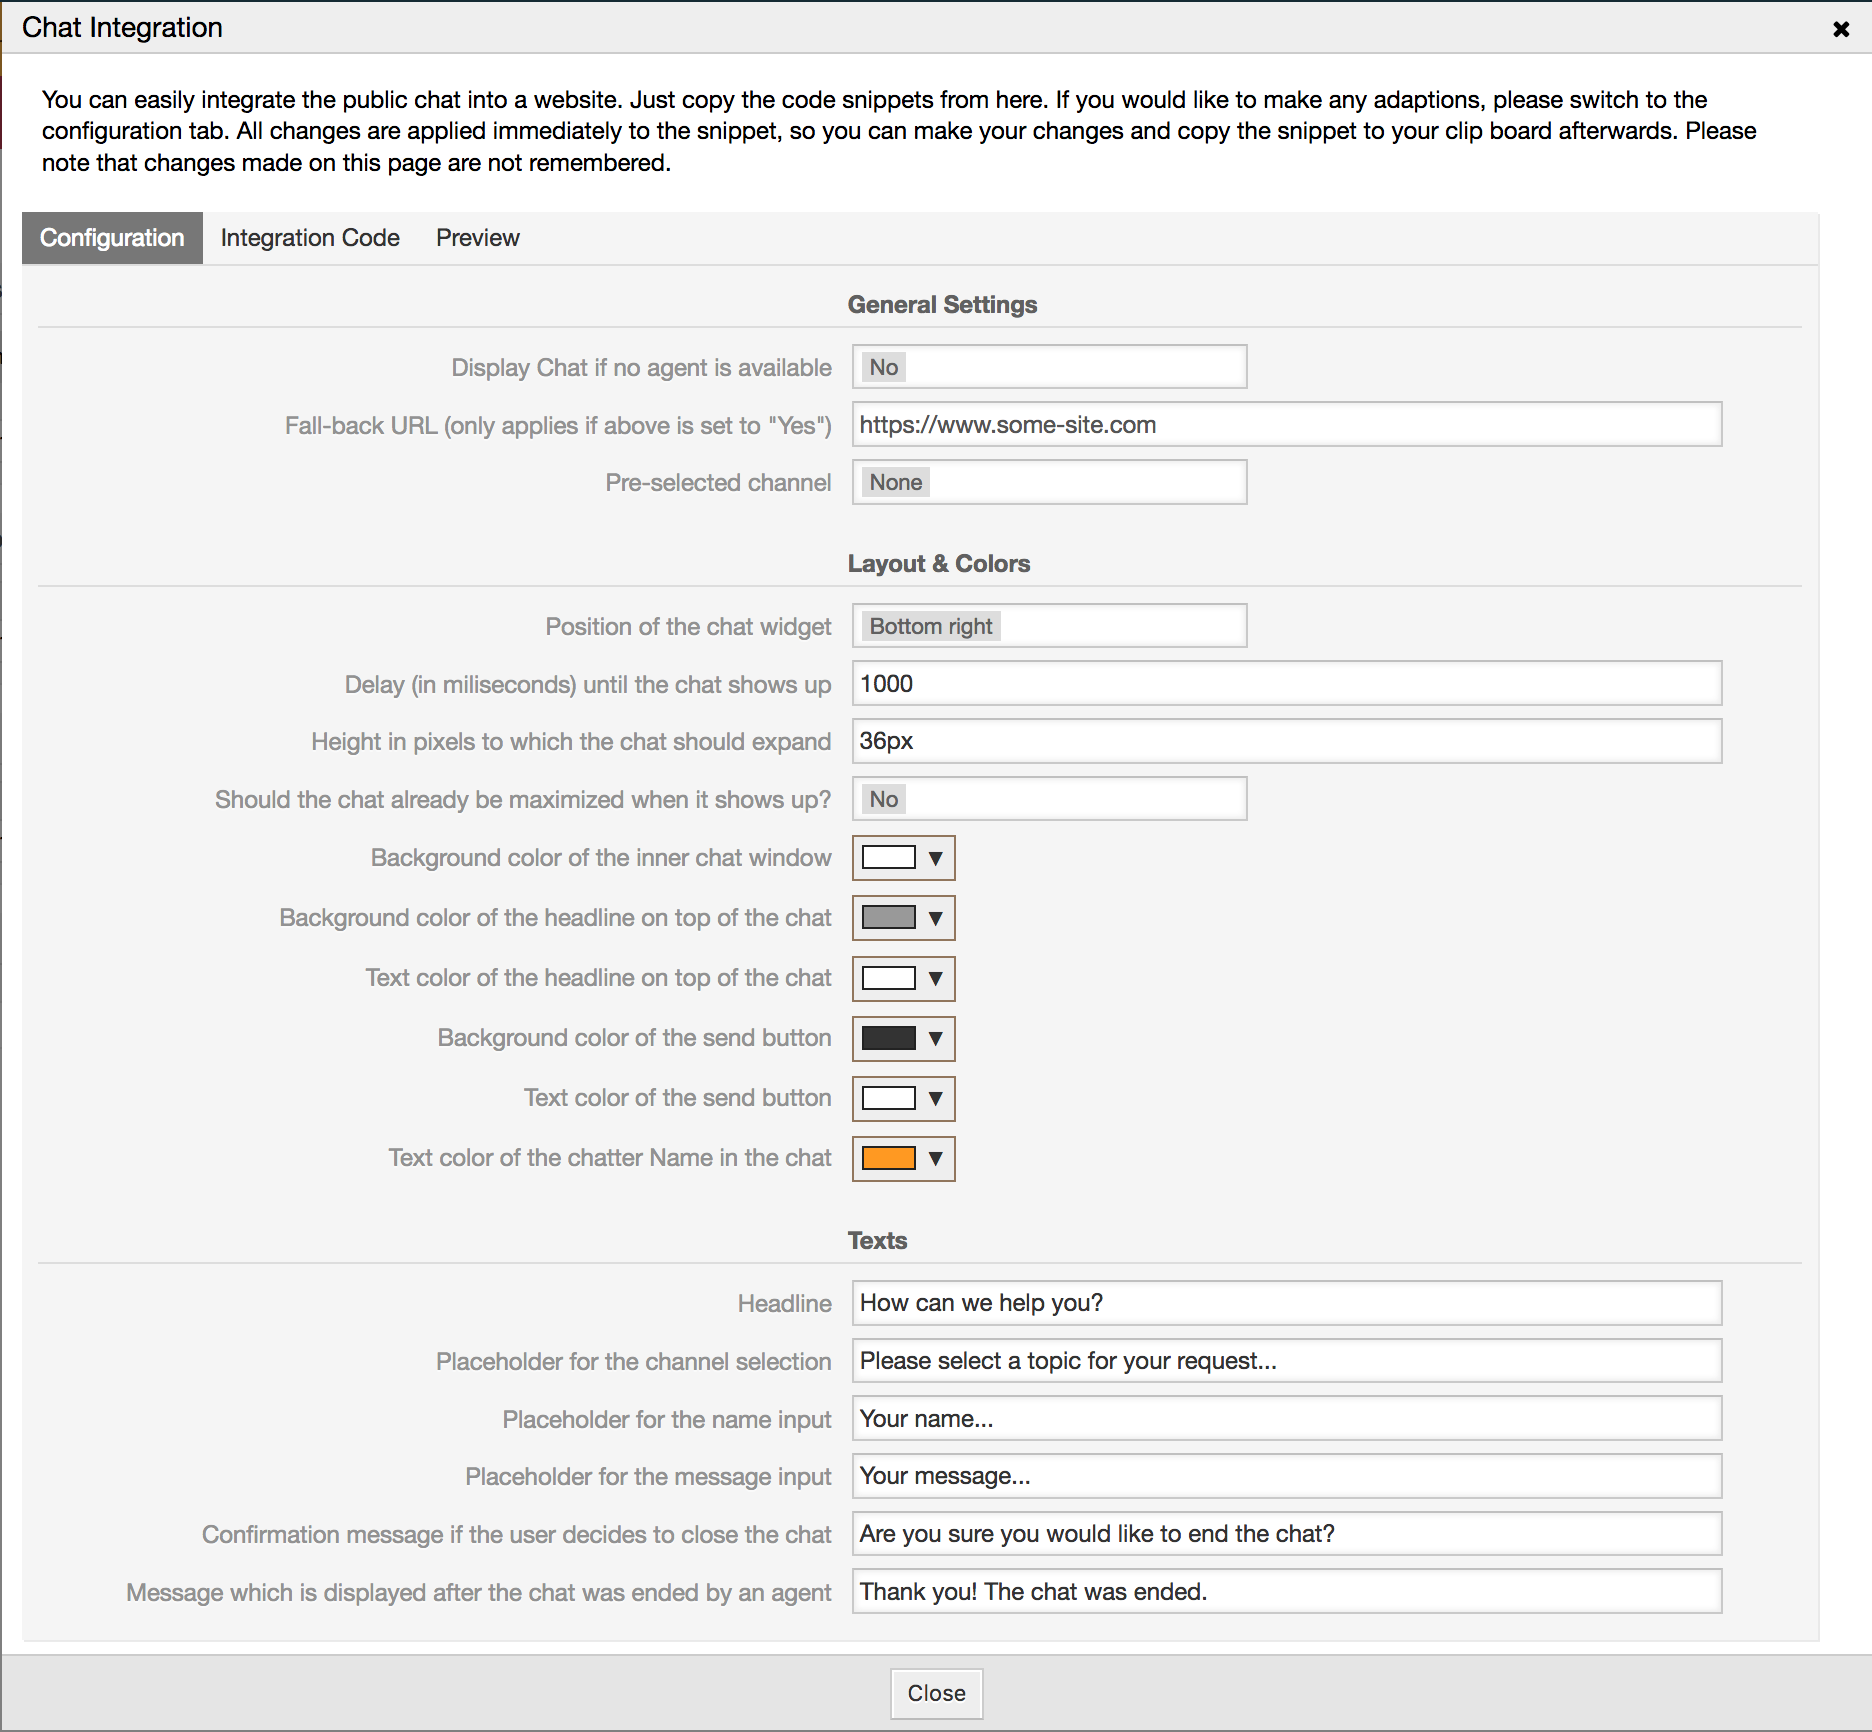
All other options pertains layout, colors and texts used by the chat widget. You can tweak them to match your overall website theme.
Note
Please note that changes made in the configuration tab will not be saved. Every time you open this dialog, all fields will be reset to default values.
Integration Code tab contains necessary code snippets for insertion in a website, so public chat can work. All changes in the Configuration tab are applied immediately to the snippets, so you can make your changes and copy the code to your clipboard right afterwards.
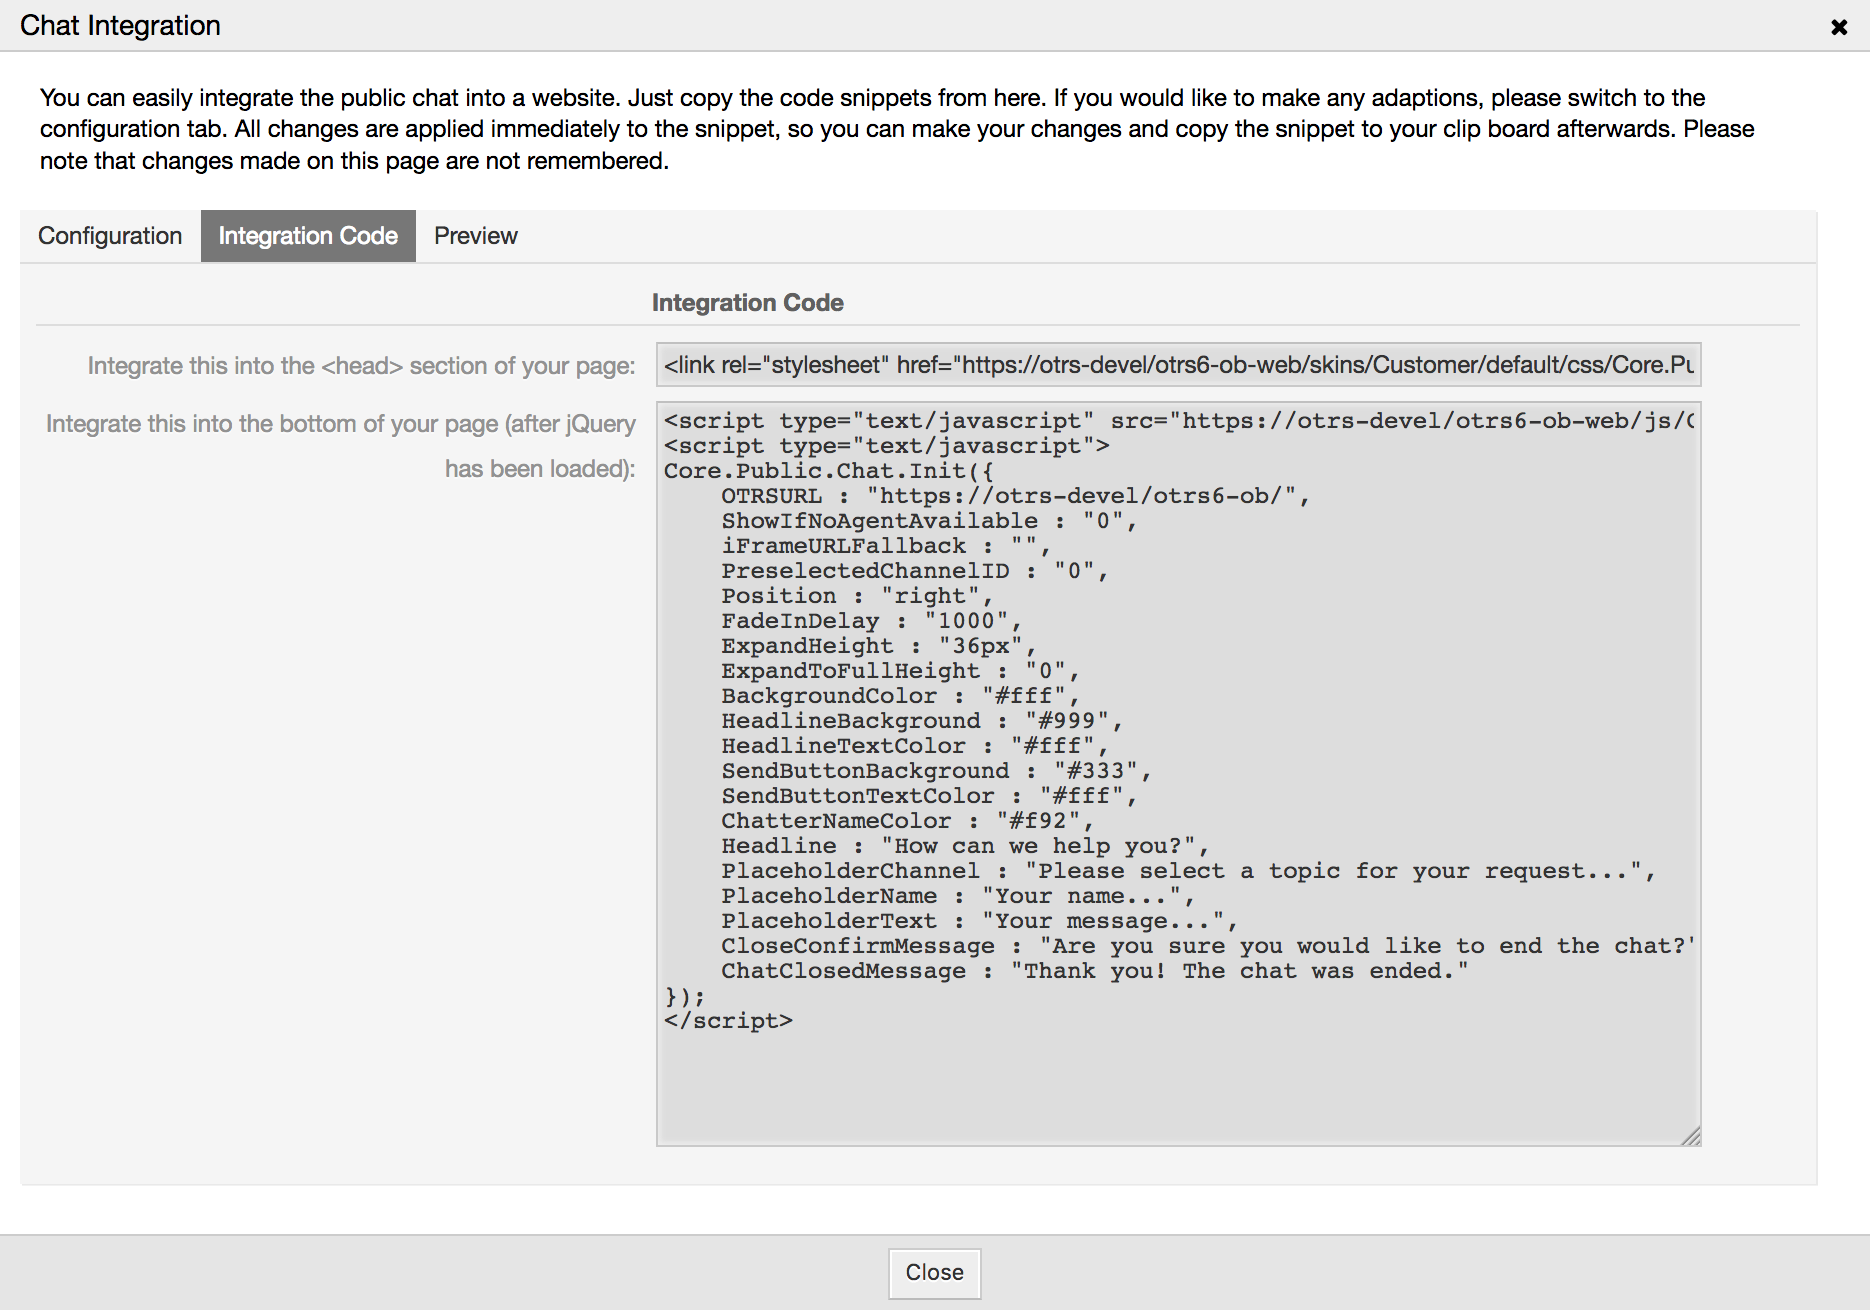
Code from the first field should be added to the <HEAD> section of your web page.
Code from the second field should be inserted into the bottom of the page: before closure of the
<BODY> tag, but after the line that loads jQuery library.
Note
Please note that your web page must also include jQuery library for the code snippets to work.
This can be recognized by reference to the jquery.js or
jquery.min.js file somewhere in the page.
Using the Preview tab you can see the chat widget in action. In the browser simulator below, you can see the chat widget look based on current configuration.
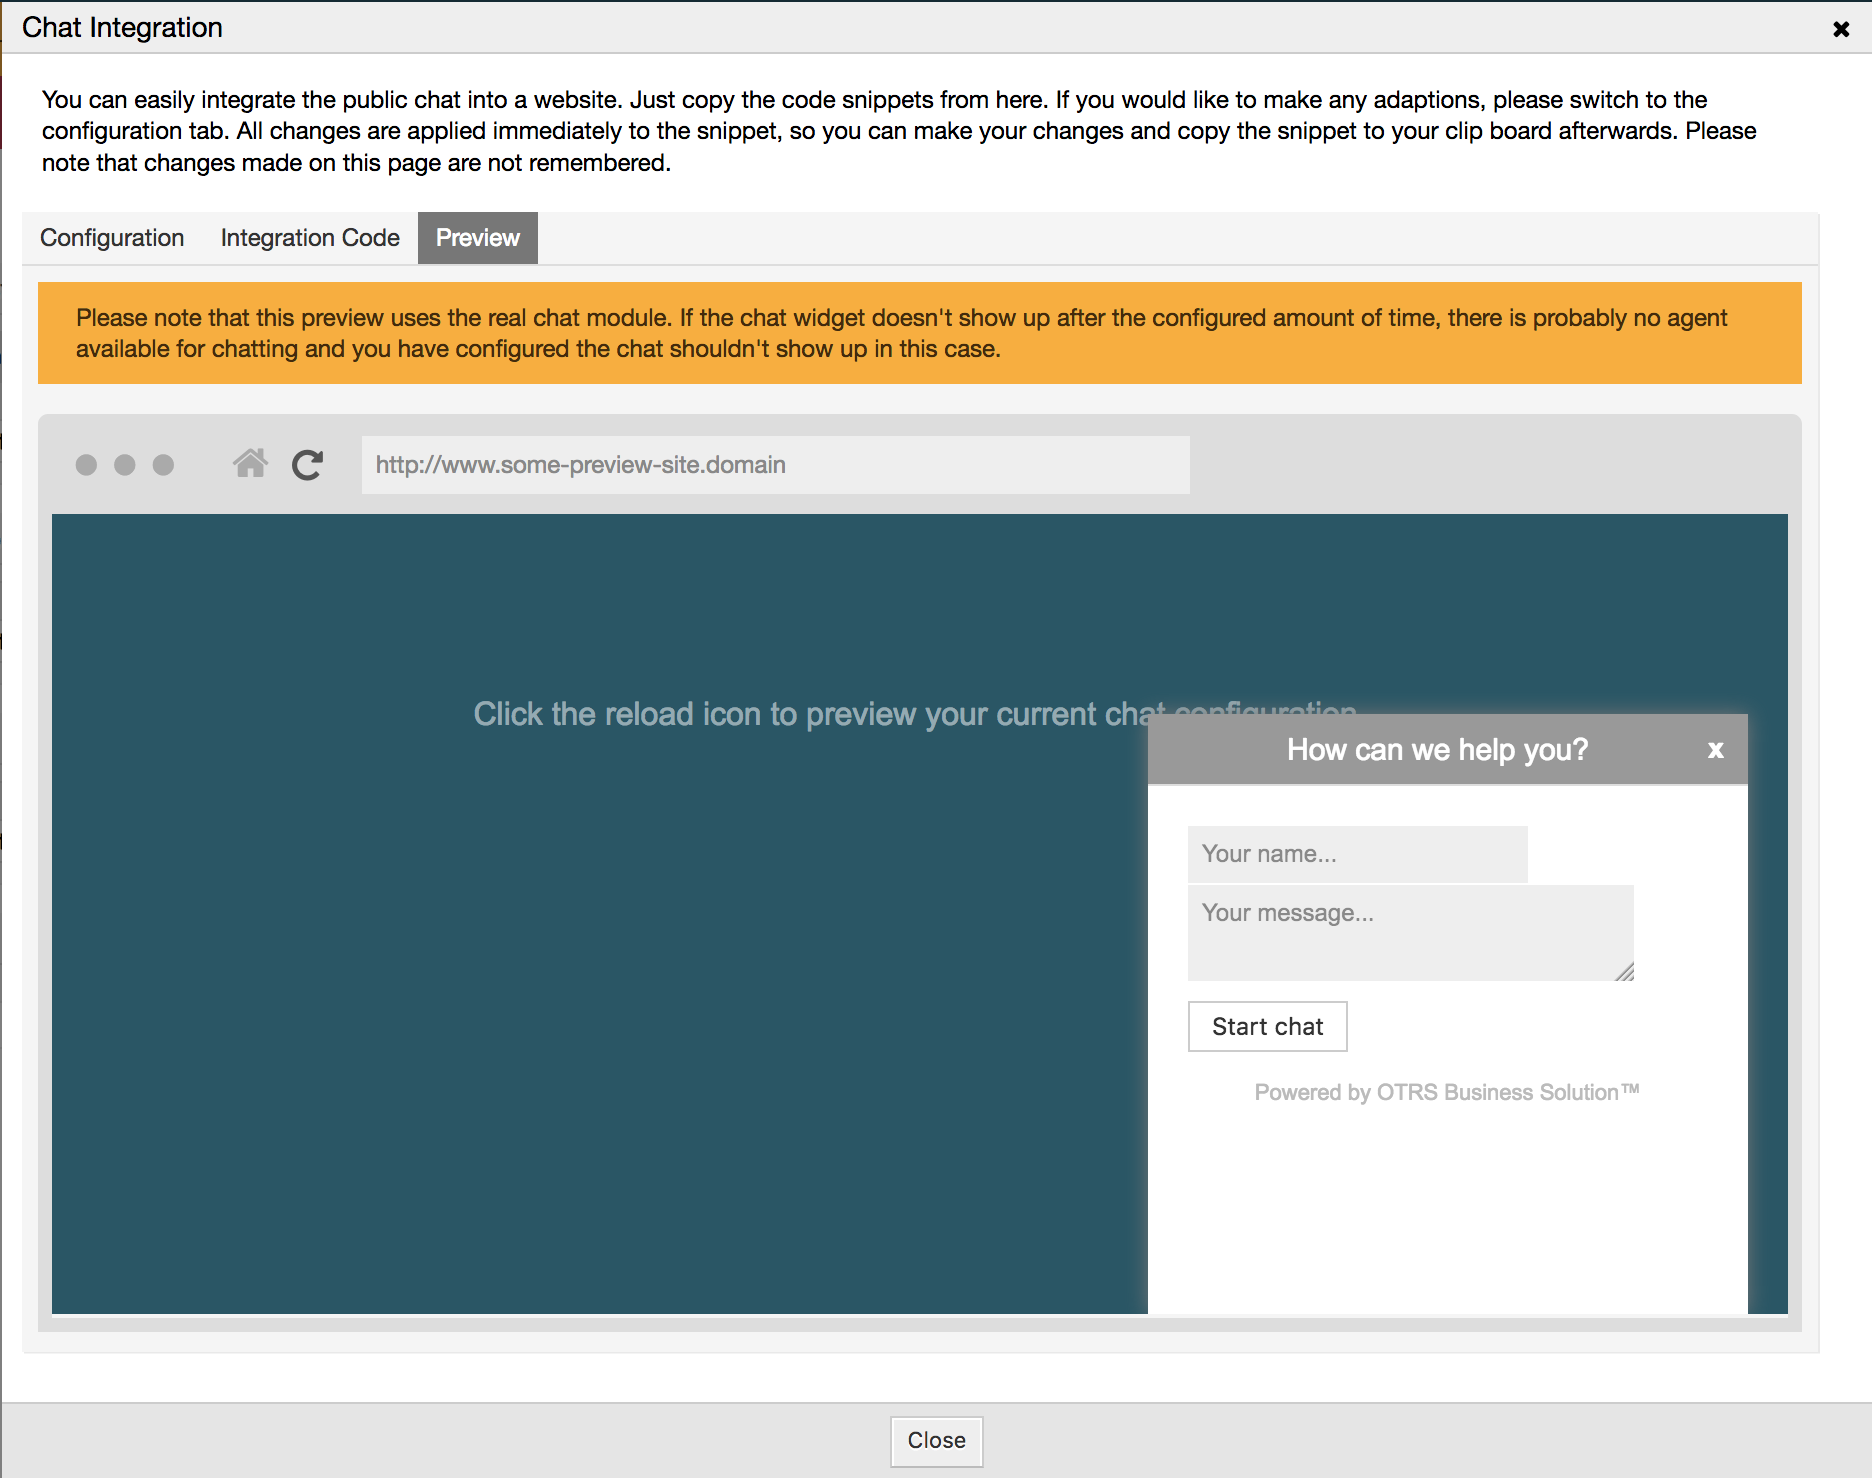
By clicking on the reload icon, you can refresh the simulation at any time.
Note
Please note that the preview uses the real chat module. If the chat widget doesn't show up after the configured amount of time, there are probably no agents available for chatting and you have configured the chat shouldn't show up in this case.
If you cannot see the chat widget, but everything seems in order, make sure you have at least one agent who is externally available for chat. Or switch on the Display Chat if no agent is available option in the Configuration tab, and refresh the code.
If you get mixed-content warnings in your browser console, make sure that OTRS configuration option
HttpTypeis properly set. For example, if you are running OTRS on SSL, this configuration option must be set tohttps. Your website must run on the same protocol for chat widget to work.If you get errors saying that
$variable is undefined, make sure that jQuery library is included in your web page, and that chat related code is placed below it.