Resource planning feature in OTRS Business Solution™ complements built-in calendar feature of OTRS. It enhances original calendar implementation by introducing resource allocation for appointments. Furthermore, resources can be assigned to separate teams, which in turn can be used to filter resource overview and availability.
In order to be able to assign appointments to resources, you must first define teams for those resources.
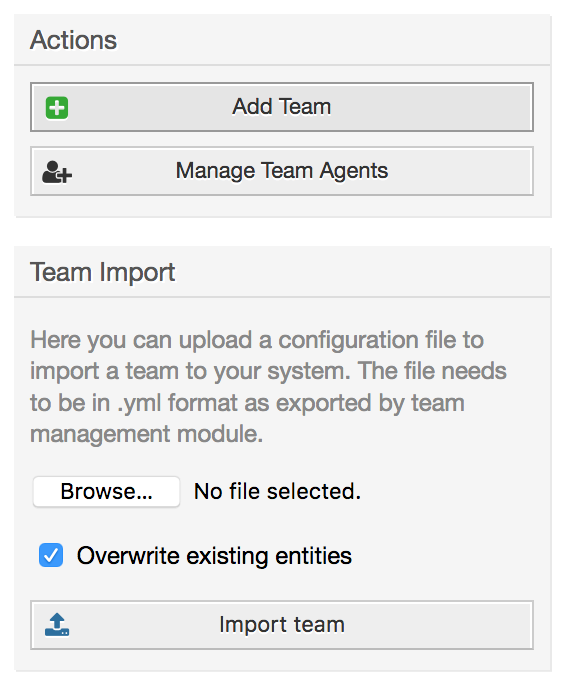
Teams can be added or imported from Manage Teams screen accessible via top navigation menu. In order to import a team, you must have an exported YML configuration file of the team from an existing OTRS installation.
Adding new team is easy: just define a team name and permission group. Full access to this group is required for anyone to be able to manage the team, its agents and assign them as resources to appointments.

Once you have teams set up, you must define which agents belong to which teams. This is done via dedicated screen where you can adjust relations of agents and teams very much like you can do it for agents and groups.
Note
Please note that in order to see agents in this screen, you must define them first via Admin → Agents screen.

By choosing a team from this screen, you can assign agents to it, and vice-versa.

Finally, once you have both teams and their agents set up, you can proceed to a calendar overview and start assigning appointments to teams and agents.
Simply add or edit an appointment, and choose both team and agent from the lists under resource. You can do this via any calendar overview, as appointment edit dialog is the same for all of them.
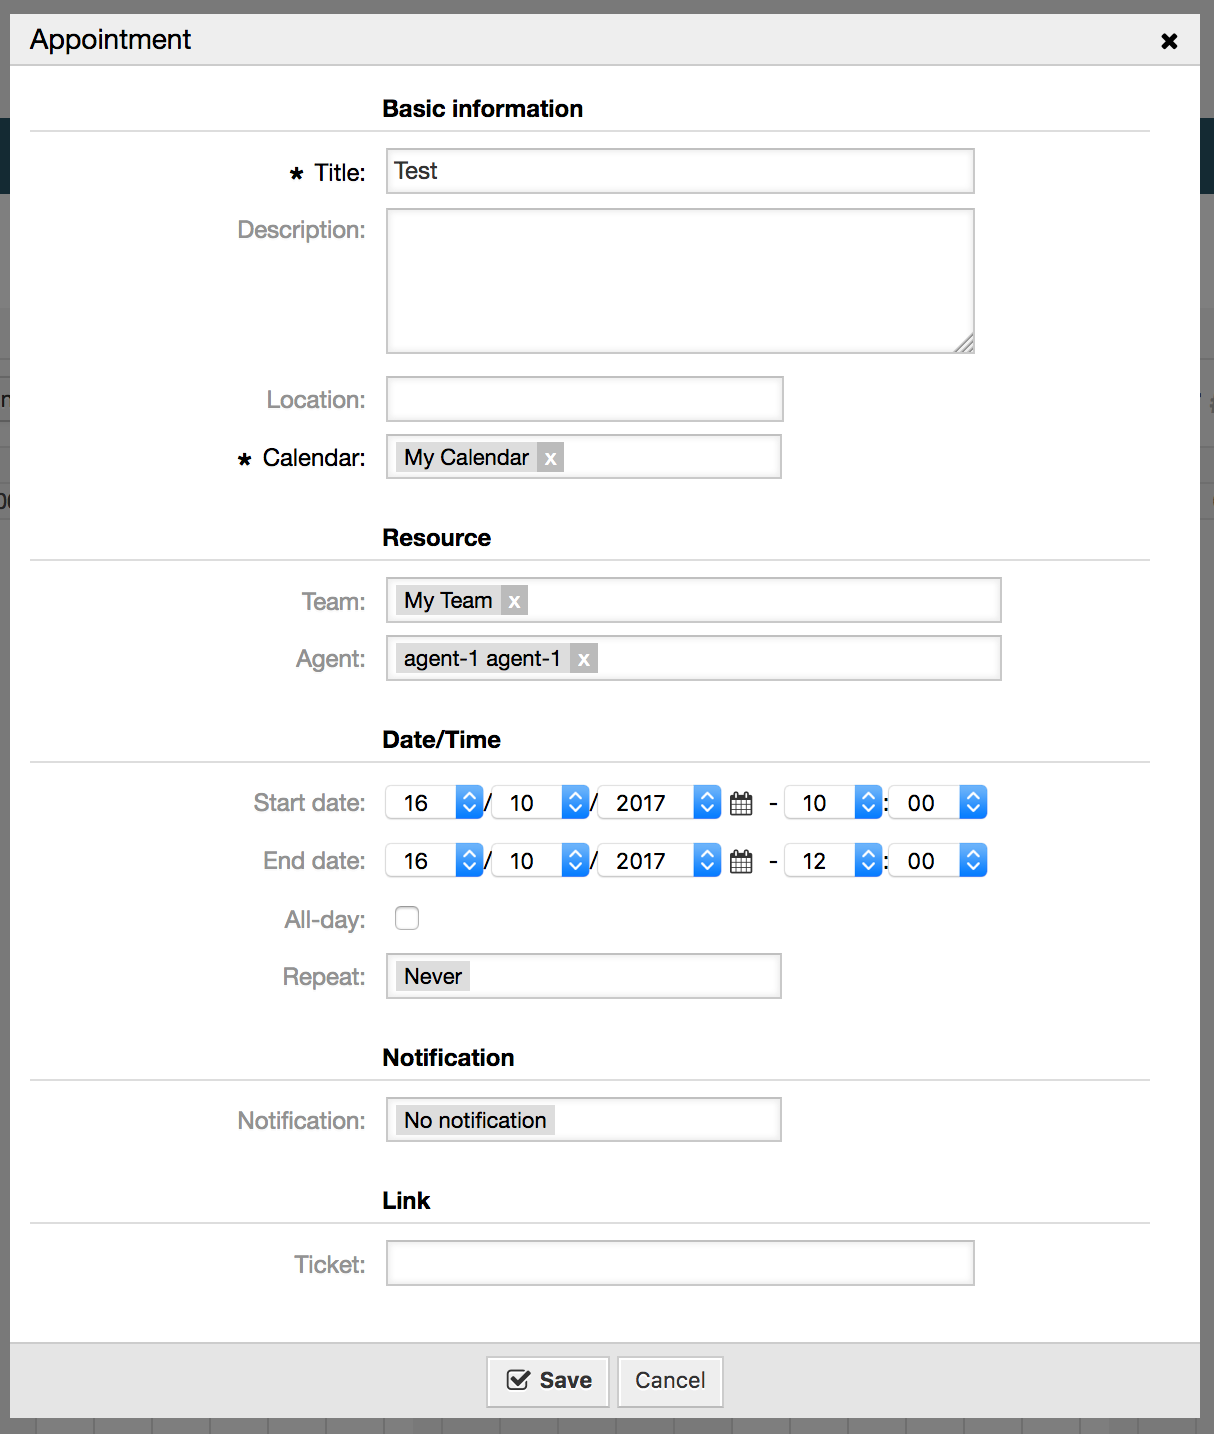
You can assign multiple teams and agents to a single appointment, but you must always choose a team first. Resulting list of agents is an aggregate of all selected teams, without any duplicates. Choosing an agent from the list is also optional, so you can leave an appointment assigned only to a team.

Note
Once you assign an appointment to a team and/or agent, make sure to save it so your changes are applied.
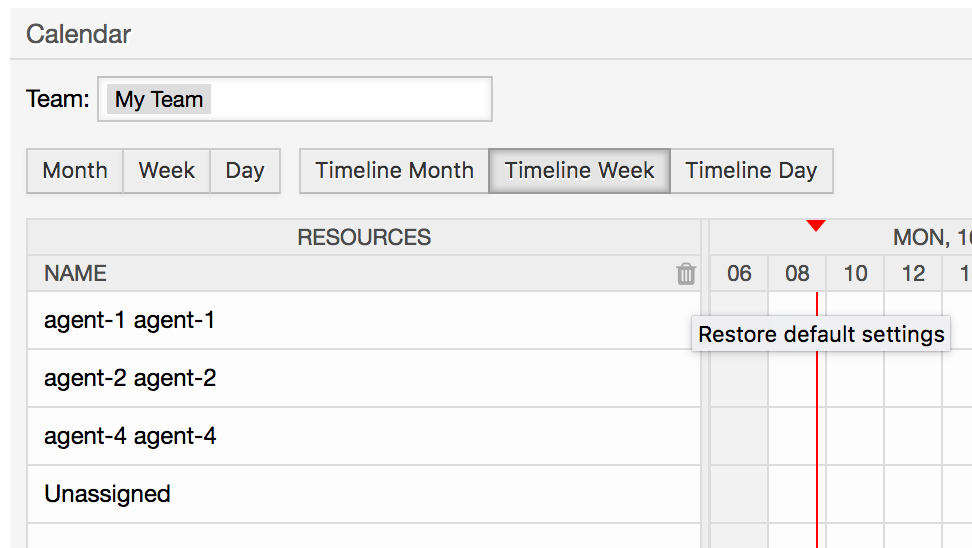
While it's possible to assign resources to an appointment in any calendar overview, one screen is designed exclusively for allocating resources to appointments: Resource Overview. This screen looks very much like a regular calendar overview, except it has a filter for teams on top and a list of agents for that team (available only in timeline views).
By choosing a team from the top filter, you will be presented with all appointments assigned to it.
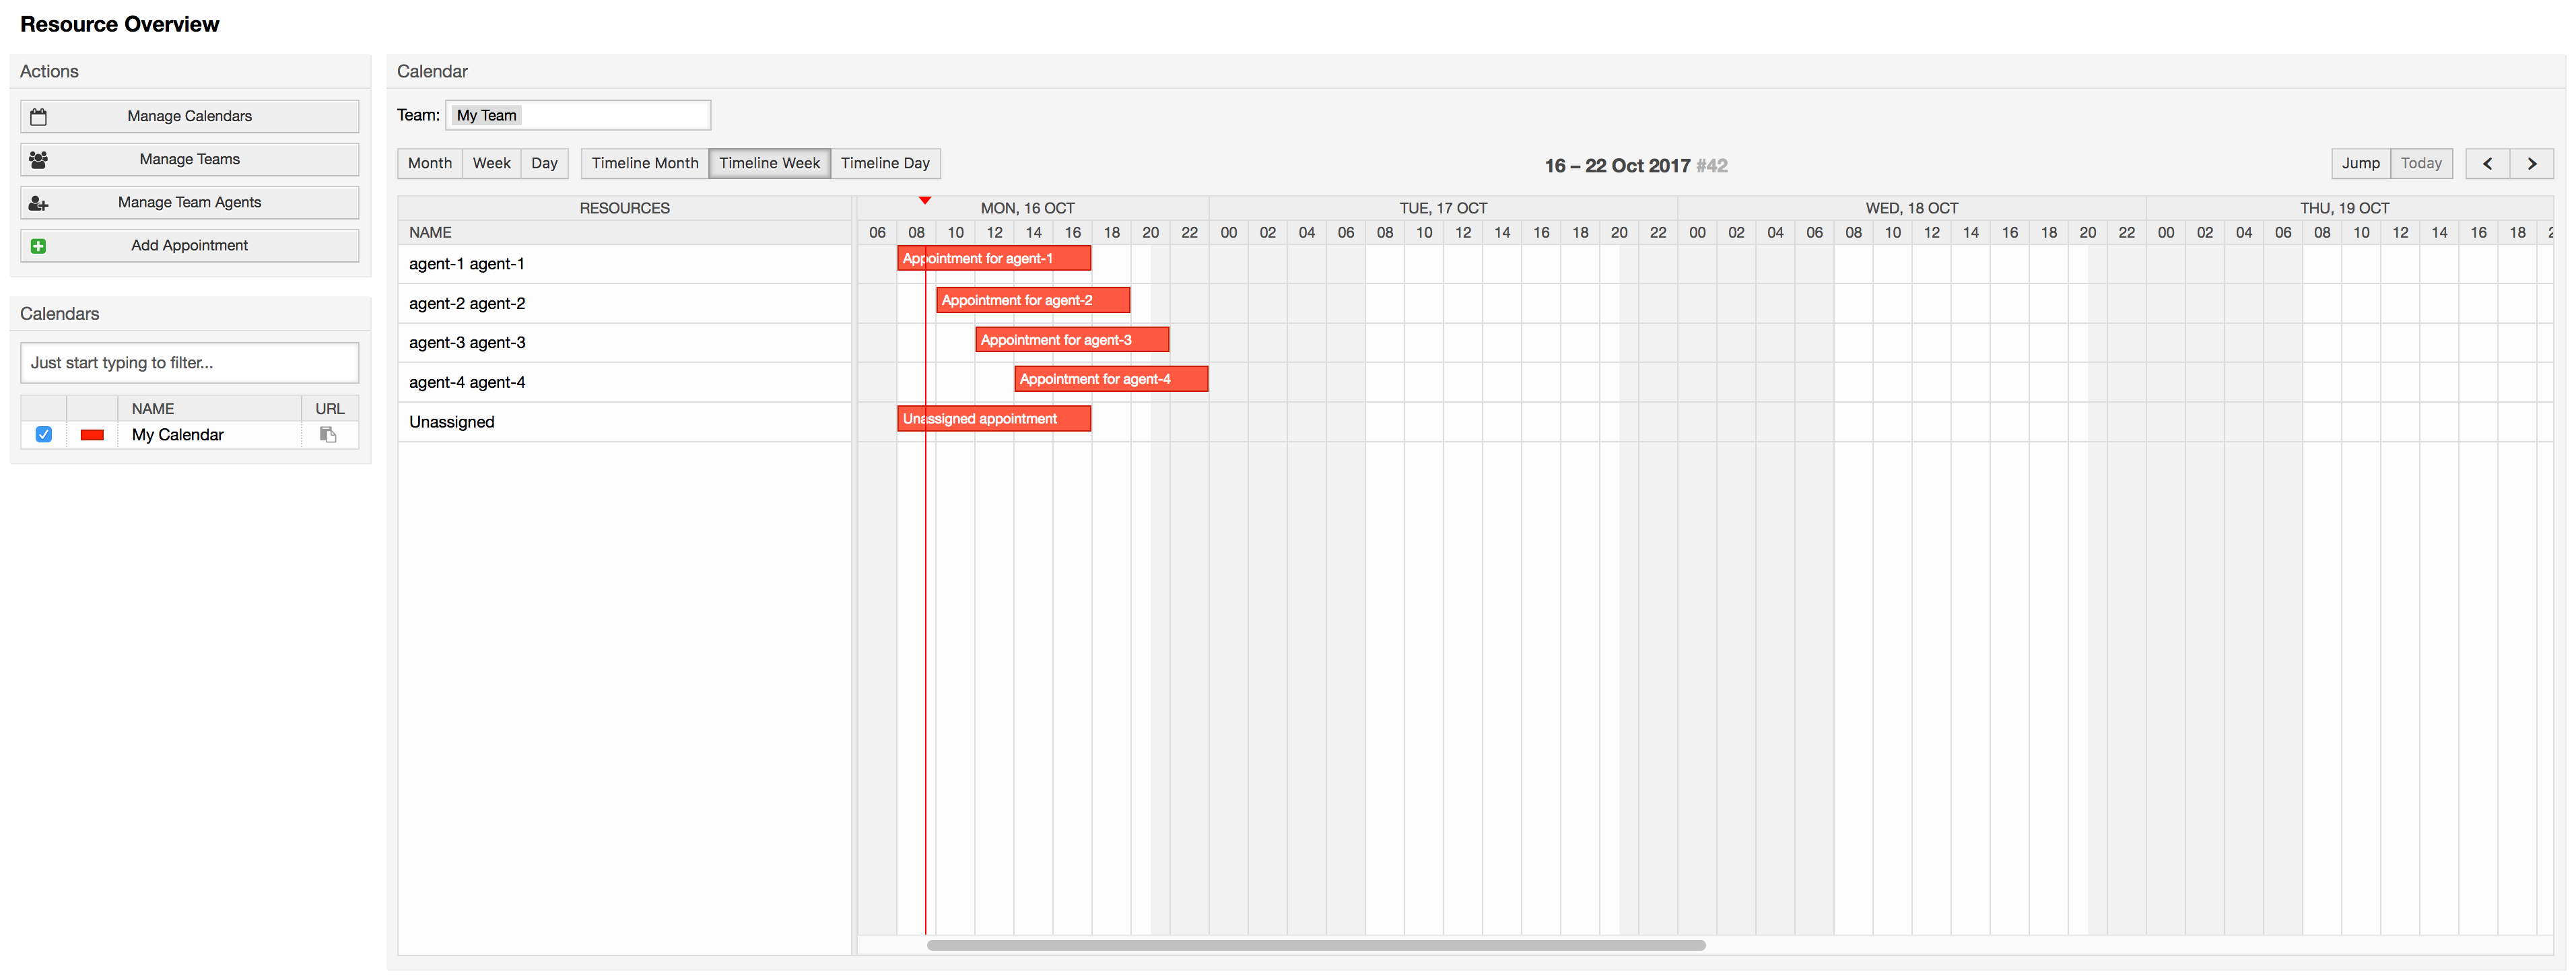
By simply dragging an appointment to a row line with an agent's name in timeline view, it's possible to assign an appointment to this resource. If an appointment does not have an agent assigned to it, it will appear in the unassigned area of the screen.
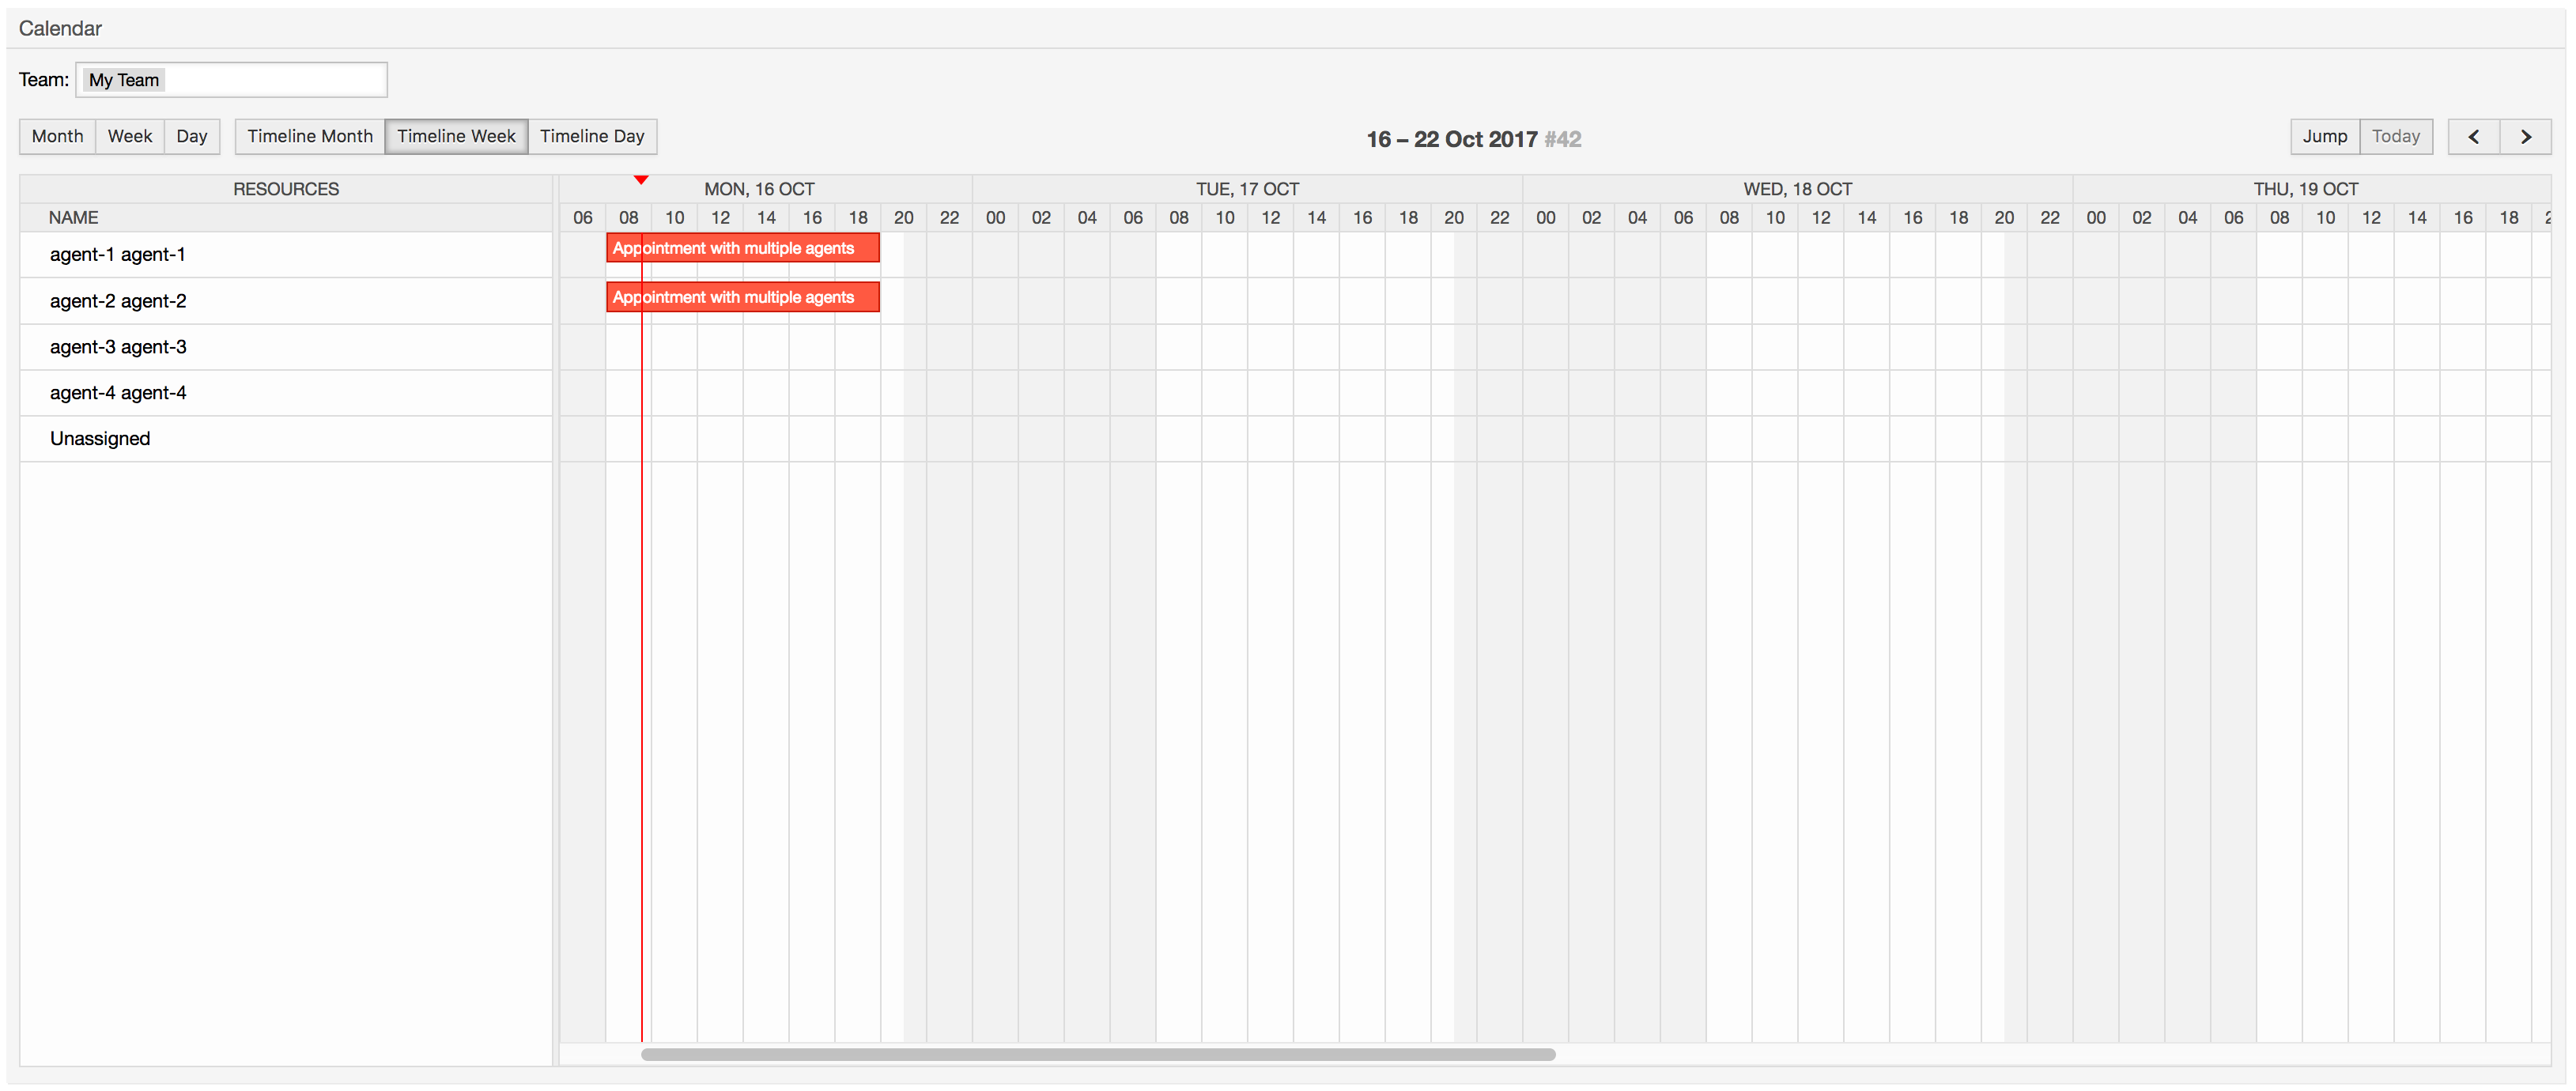
Appointment with multiple agents will be displayed as duplicated, but it most certainly is not. Dragging one instance of this appointment will move all them in the same fashion.
Note
Please note that appointments with unassigned teams or assigned different team than currently selected, will not show up in the resource overview. You will have to switch to a different overview to see these appointments, so make sure to assign them to a correct team first.
By editing settings of the resource overview (via gear icon in top right corner), you can choose which team agents are displayed within the overview.
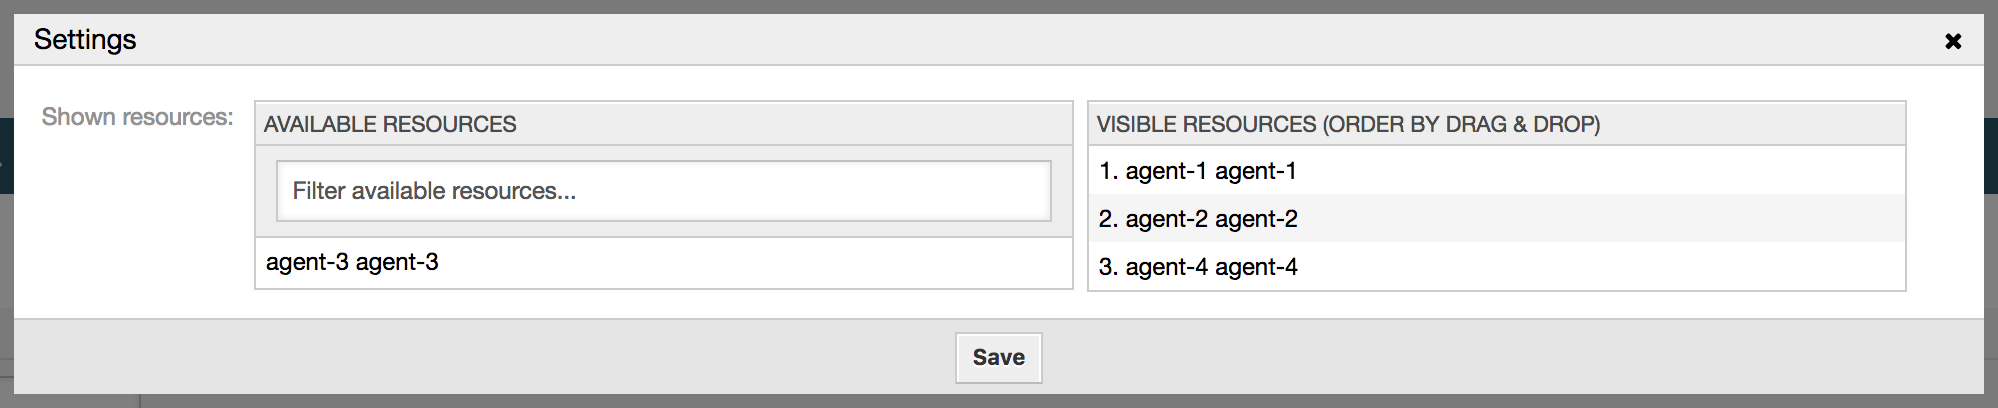
This setting is user and team specific, and if you have defined an agent filter in this way, a trash icon will be displayed on top of the list of agents so you can remove it easily.
In all other aspects, resource overview screen behaves in the same way as a regular calendar overview.