This feature of OTRS allows you to model processes (work-flows) in the ticket system. The basic idea is to be able to define recurring processes, and to delegate work items to different people, as well as leading the progress of a process in different directions based on certain criteria.
Let's see an example to make it more demonstrative. We will define a book order process:
Before an order will be placed, the demand for literature by an employee will be recorded. The following book is needed in our example:
Title: Prozessmanagement für Dummies
Autor: Thilo Knuppertz
ISBN: 3527703713
The head of the employee's department needs to decide on the order. In case of a denial, a reason should be recorded by the manager. In case of approval, the order is passed to the purchasing department.
Purchasing now has the task to find out where the book can be ordered with the best conditions. If it is out of stock, this can be recorded in the order. In case of a successful order purchasing will record the supplier, the price and the delivery date.
If we assume that a ticket acts in this work-flow like an accompanying document that can receive change notes, we already have a clear picture of process tickets.
From the analysis of the example process we can identify the following necessary items:
Possibilities to record data, let's call them Activity Dialogs,
Checks which can react to changed data automatically, let's call them Transitions,
changes which can be applied to a process ticket after successful transitions of a process ticket, let's call them Transition Actions.
We also need an additional item which might not be as obvious:
A possibility to offer more than just one Activity Dialog to be available. In our example this is needed when the manager must have the choice between "Approve" and "Deny". Let's call this Activity.
Now, with Activities, Activity Dialogs, Transitions and Transition Actions we have the necessary tools to model the individual steps of our example. What's still missing is an area where for each work-flow the order of the steps can be specified. Let's call this Process. To be able to refer to all these entities later, we will assign to them an abbreviation in parentheses. This abbreviation is based on an internal identification mechanism called EntityIDs.
The EntityIDs are conformed with one or two letters (depending on the process part or entity) and then a consecutive number, examples:
Process: 'P1', 'P2' ... 'Pn'.
Activity: 'A1', 'A2' ... 'An'.
Activity Dialog: 'AD1', 'AD2' ... 'ADn'.
Transition: 'T1', 'T2' ... 'Tn'.
Transition Action: 'TA1', 'TA2' ... 'TAn'.
Before the creation of the process and its parts is necessary to prepare the system, we will need to define some Queues, Users and Dynamic Fields as well as set some SysConfig options.
Create the following Queues:
Management
Employees
Purchasing
Post office
Create the following Users:
Manager
Employee
Create the following Dynamic Fields:
Title
Label Title Type Text Object Ticket Author
Label Author Type Text Object Ticket ISBN
Label ISBN Type Text Object Ticket Status
Label Status Type Dropdown Object Ticket Possible Values Approval
Approval denied
Approved
Order denied
Order placed
Shipment received
Note: Please use this exactly this possible values for "Key" and "Value" in the Dynamic Field setup.
Supplier
Label Supplier Type Text Object Ticket Price
Label Price Type Text Object Ticket DeliveryDate
Label Delivery date Type Date Object Ticket DateOfReceipt
Label Date Of Receipt Type Date Object Ticket
Set the the following SysConfig settings:
'Ticket::Responsible': Yes
'Ticket::Frontend::AgentTicketZoom###ProcessWidgetDynamicFieldGroups':
Key: Content: Book Title, Author, ISBN General Status Order Price, Supplier, DeliveryDate Shipment DateOfReceipt 'Ticket::Frontend::AgentTicketZoom###ProcessWidgetDynamicField':
Key: Content: Author 1 DateOfReceipt 1 DeliveryDate 1 ISBN 1 Price 1 Status 1 Supplier 1 Title 1
Now lets start with the real Process Management stuff. In the next step, we will define the individual entities that we need.
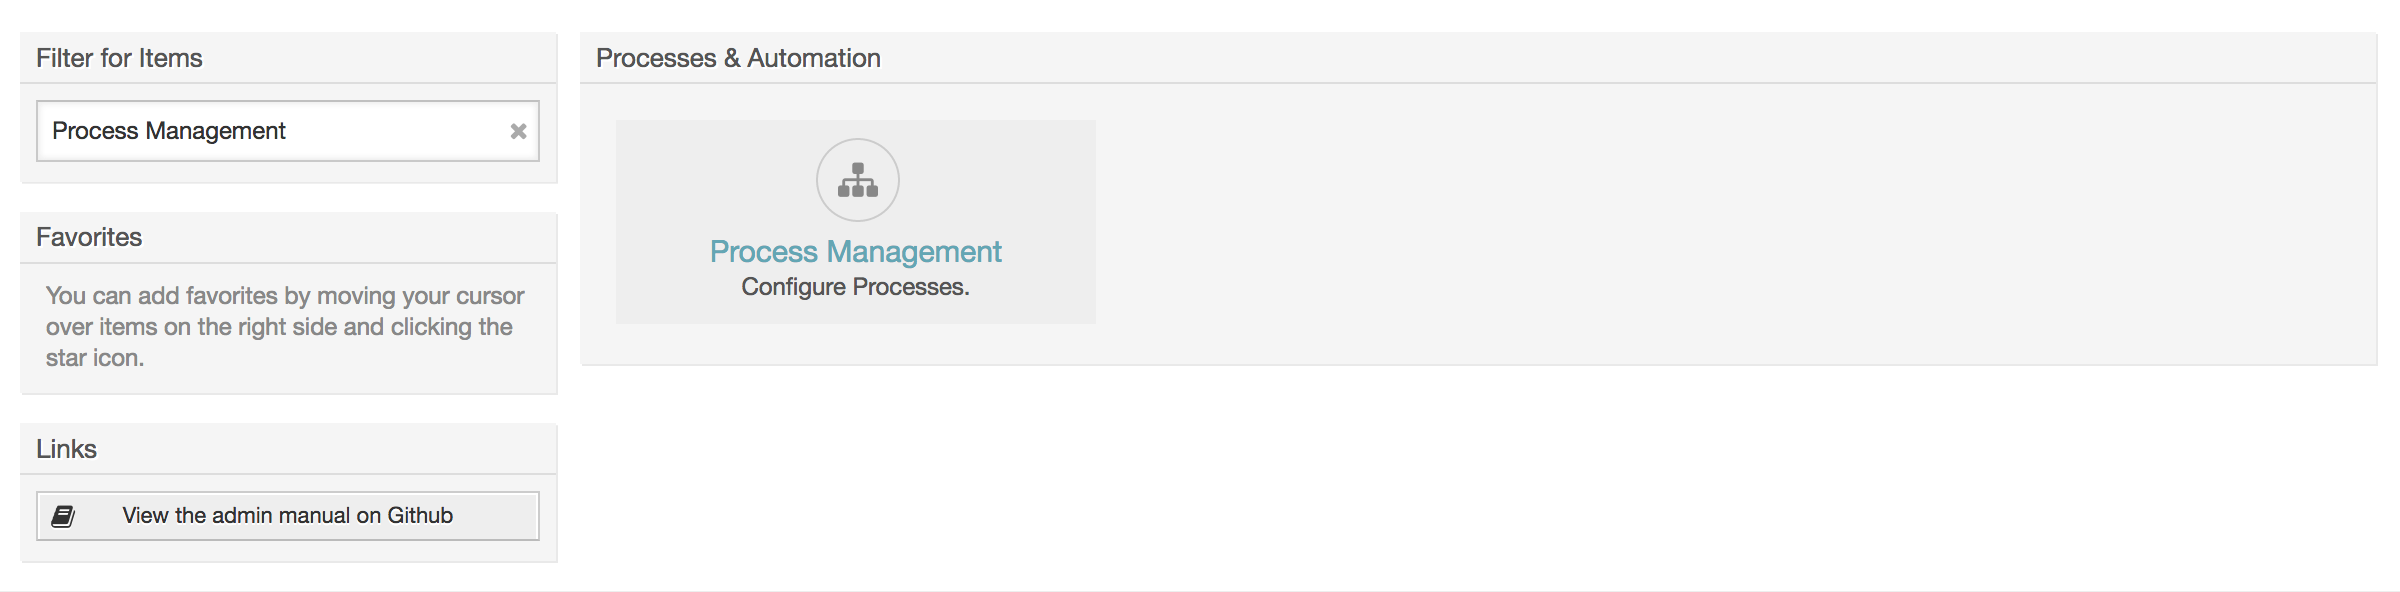
To create a new process is necessary to click on the "Process Management" link in the System Administration box in the Admin panel, this will lead to the Process Management Overview screen. After the creation of the process we can create all other entities (or process parts).
Note
Activities, Activity Dialogs, Transitions and Transition Actions defined in one process will be available for all the processes in the system.
Click on the "Create New Process" action from the Actions box.
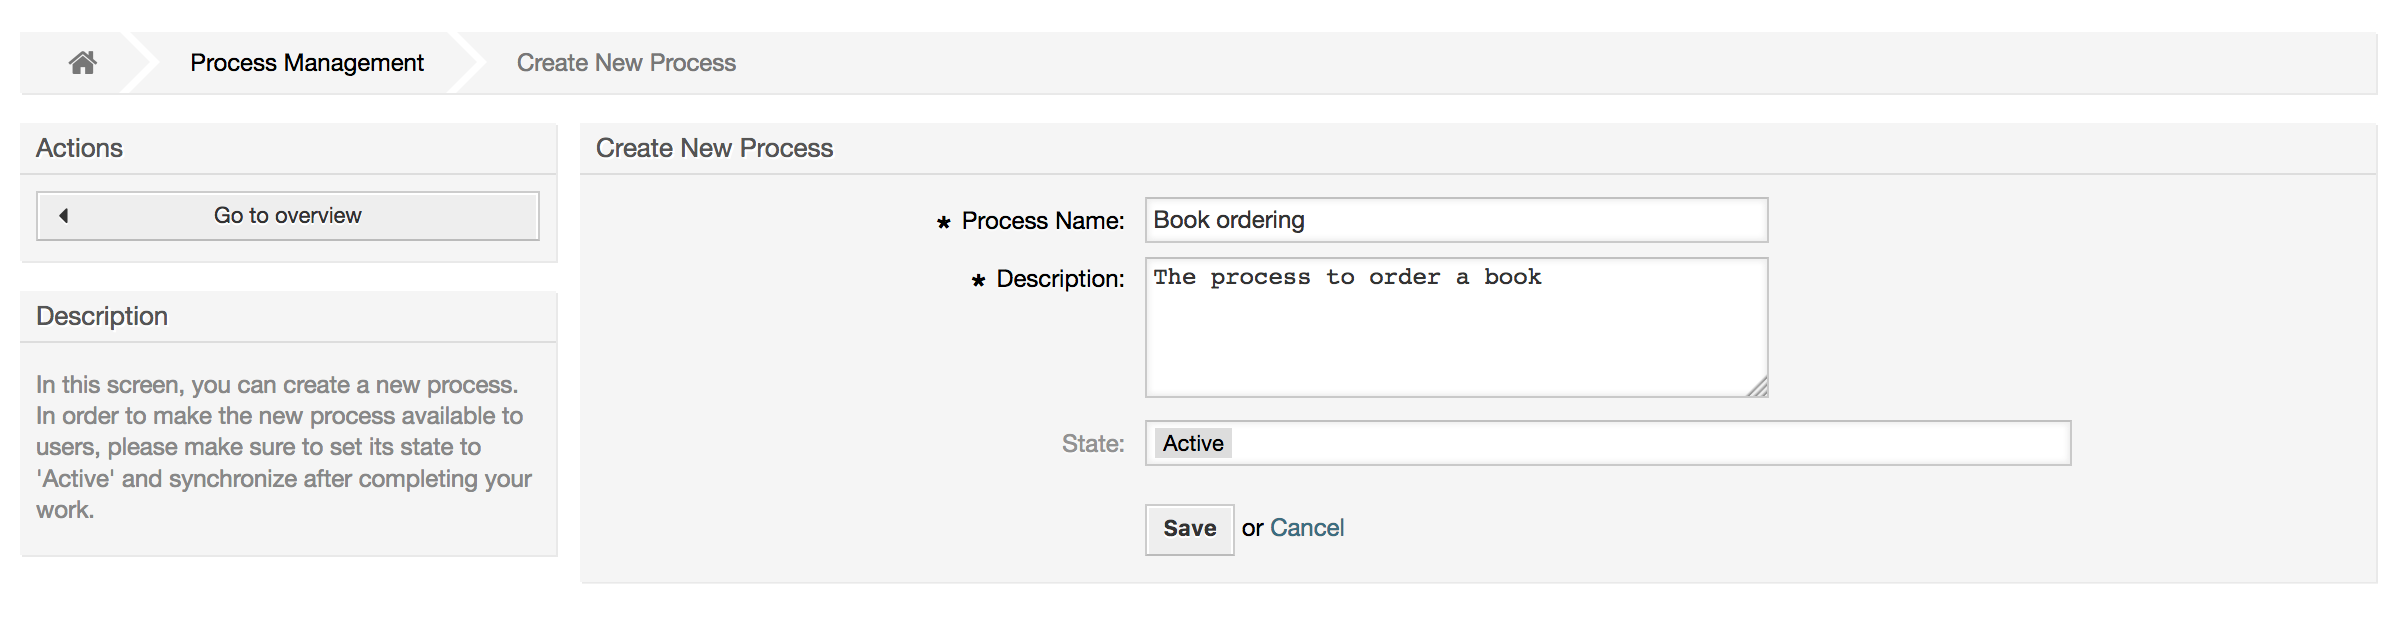
Fill the process information,set Process Name and the Description, we will leave the process State as "inactive", until we finish all the tasks. Save the process.
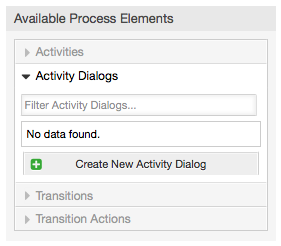
Click on the new process name in the Process Management Overview Screen, then in the "Available Process Elements" click in "Activity Dialogs" (this action will expand the activity dialog options and will collapse all others doing an accordion like effect), then click on "Create New Activity Dialog".
In the opened popup screen fill the "Activity dialog Name" as well as the "Description (short)" fields, for this example we will leave all other fields as the default, to assign fields to the Activity Dialog simple drag the required field from the "Available Fields" pool and drop into the "Assigned Fields" pool. The order in the "Assigned Fields" pool is the order as the fields will have in the screen, to modify the order simply drag and drop the field within the pool to rearrange it in the correct place.
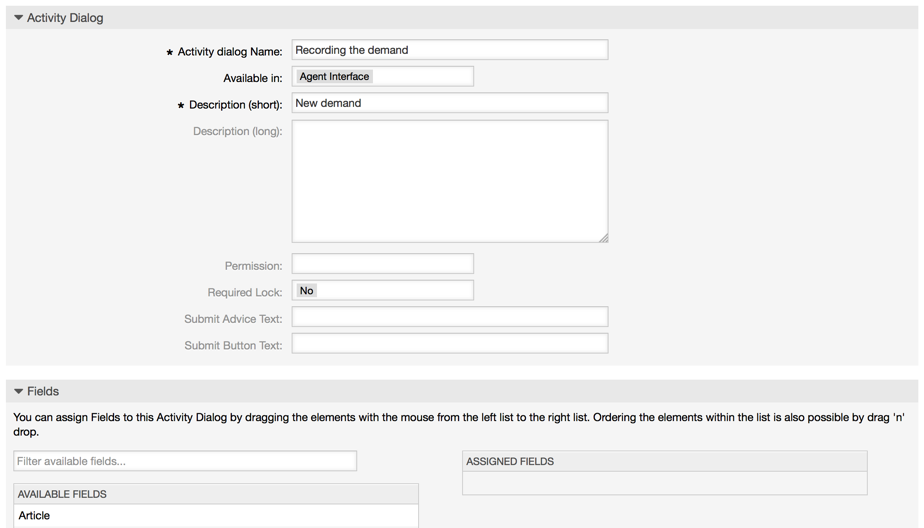
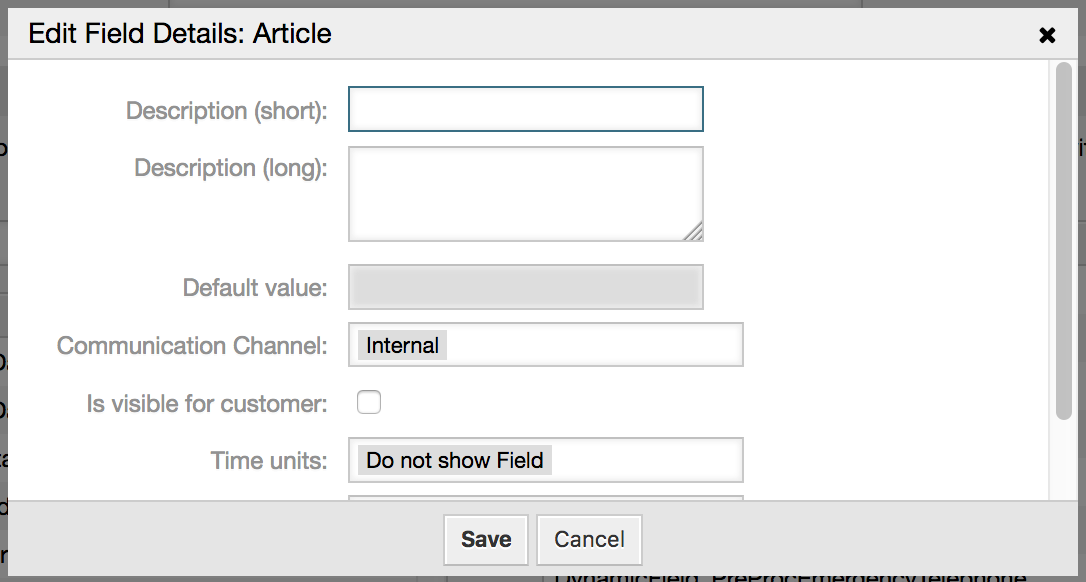
As soon as the fields are dropped into the "Assigned Fields" pool another popup screen is shown with some details about the field, we will leave the default options and only for Article fields we should make sure that the CommunicationChannel field is set to "Internal" and that the IsVisibleForCustomer is not active.
After all fields are assigned click on the submit button in the main popup screen to save the changes.
In this example we will use Article field for comments, but another option could be to create a TextArea type Dynamic Field, the rest of the mentioned fields in the lines below are the Dynamic Fields that we define before.
Please be aware that in this screen all the Dynamic Fields has the prefix "DynamicField_" as in "DynamicField_Title". Do not confuse with the field "Title" that is the Ticket Title.
Create the following Activity Dialogs:
"Recoding the demand" (AD1)
An Activity Dialog that contains all the required fields for the data to be collected for the order (Title, Author and ISBN), and a Status field with the possibility to choose "Approval".
"Approval denied" (AD2)
An Activity Dialog with a comment field (Article) and a Status field with the option "Approval denied".
"Approved" (AD3)
Here we just need the Status field with the option "Approved".
"Order denied" (AD4)
An activity dialog which makes it possible for purchasing to reject an impossible order (book out of stock). Here we also need a comment field and the Status field with the option "Order denied".
"Order placed" (AD5)
An activity dialog with the fields Supplier, Price and Delivery date for purchasing and the Status field with the option "Order placed".
"Shipment received" (AD6)
An activity for the mail room with a field for the Date of receipt and the Status field with the option "Shipment received".
To restrict the Status field for each activity dialog we need to add some ACLs
in the Kernel/Config.pm or to a new Perl file located in
Kernel/Config/Files.
    $Self->{TicketAcl}->{'P1-AD1-1'} = {
        Properties => {
            Process => {
                ActivityDialogEntityID => ['AD1'],
            },
        },
        Possible => {
            Ticket => {
                DynamicField_Status => ['Approval'],
            },
        },
    };

    $Self->{TicketAcl}->{'P1-AD2-1'} = {
        Properties => {
            Process => {
                ActivityDialogEntityID => ['AD2'],
            },
        },
        Possible => {
            Ticket => {
                DynamicField_Status => ['Approval denied'],
            },
        },
    };

    $Self->{TicketAcl}->{'P1-AD3-1'} = {
        Properties => {
            Process => {
                ActivityDialogEntityID => ['AD3'],
            },
        },
        Possible => {
            Ticket => {
                DynamicField_Status => ['Approved'],
            },
        },
    };

    $Self->{TicketAcl}->{'P1-AD4-1'} = {
        Properties => {
            Process => {
                ActivityDialogEntityID => ['AD4'],
            },
        },
        Possible => {
            Ticket => {
                DynamicField_Status => ['Order denied'],
            },
        },
    };

    $Self->{TicketAcl}->{'P1-AD5-1'} = {
        Properties => {
            Process => {
                ActivityDialogEntityID => ['AD5'],
            },
        },
        Possible => {
            Ticket => {
                DynamicField_Status => ['Order placed'],
            },
        },
    };

    $Self->{TicketAcl}->{'P1-AD6-1'} = {
        Properties => {
            Process => {
                ActivityDialogEntityID => ['AD6'],
            },
        },
        Possible => {
            Ticket => {
                DynamicField_Status => ['Shipment received'],
            },
        },
    };
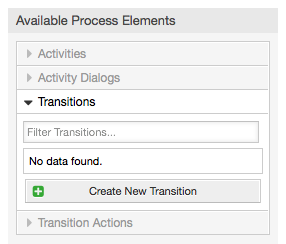
In the "Available Process Elements" click in "Transitions", then click on "Create New Transition".
In the opened popup screen fill the "Transition Name", then in the conditions, for this examples we will use just one condition and just one field, for both we can leave the Type of Linking as "and" and we will use the filed match type value as "String".
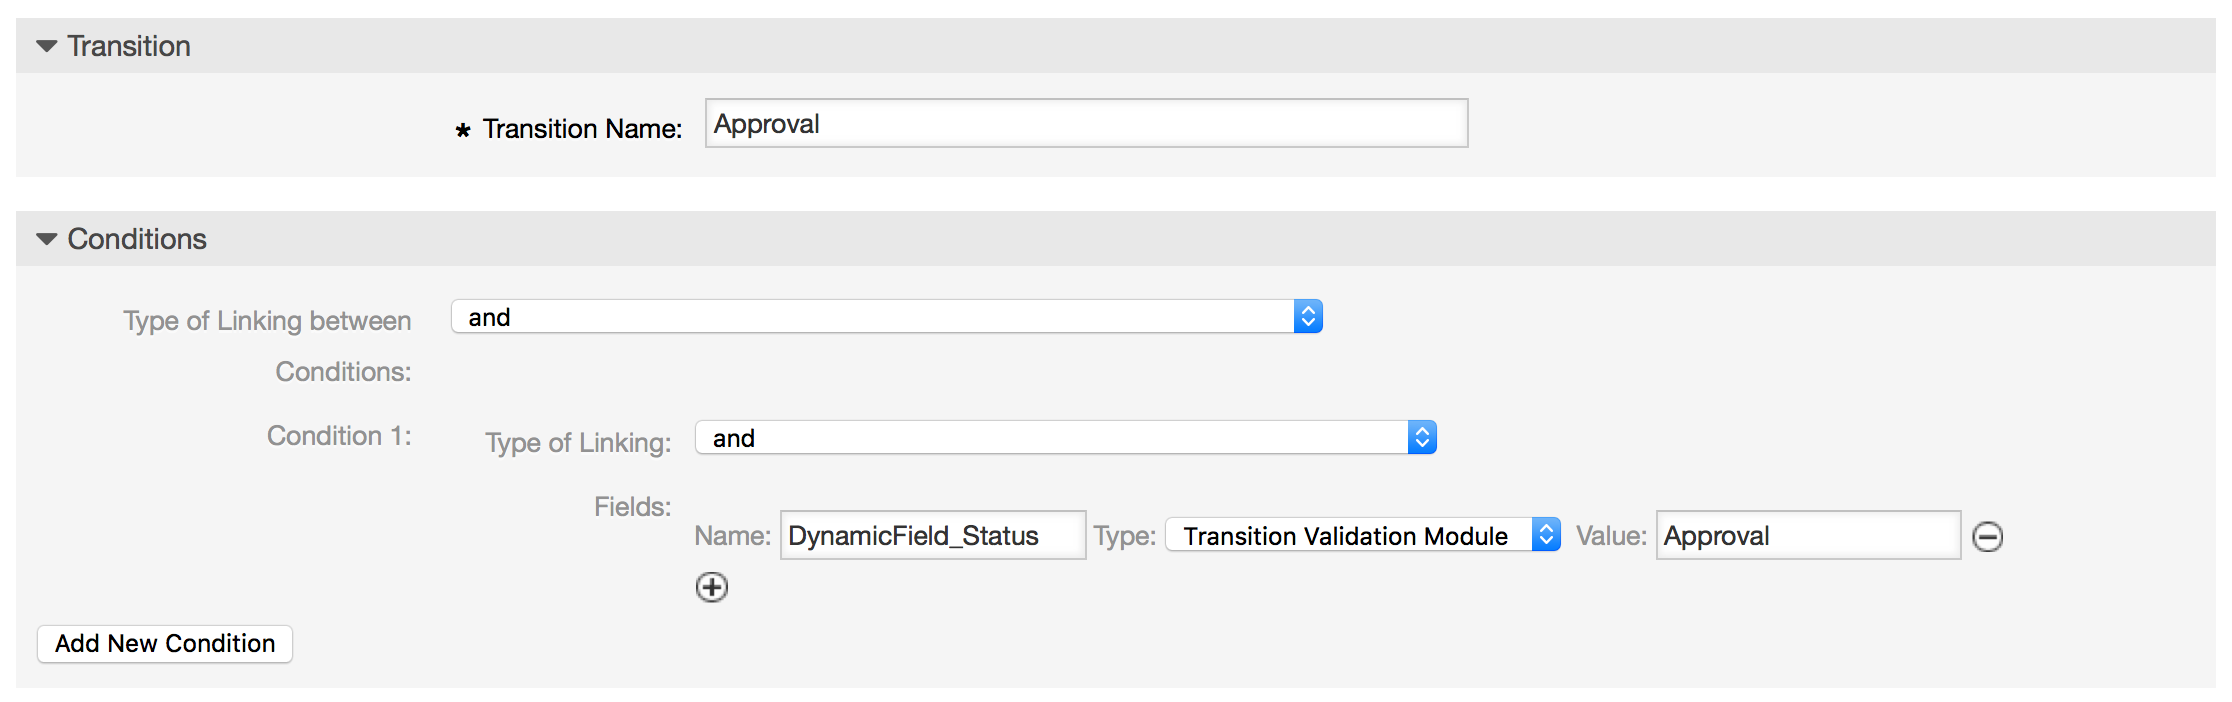
After all conditions are set click on the submit button to save the changes.
Create the following Transitions:
"Approval" (T1)
A transition which checks if the Status field is set to "Approval".
"Approval denied" (T2)
A transition which checks if the Status field is set to "Approval denied".
"Approved" (T3)
A transition which checks if the Status field is set to "Approved".
"Order denied" (T4)
A transition which checks if the Status field is set to "Order denied".
"Order placed" (T5)
A transition which checks if the Status field is set to "Order placed".
"Shipment received" (T6)
A transition which checks if the Status field is set to "Shipment received".
Click on "Transition Actions" in the "Available Process Elements", then click on "Create New Transition Action".
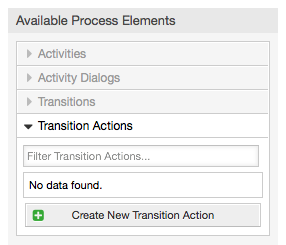
In the opened popup screen fill the "Transition Action Name", and the "Transition Action module" then add the required and optional parameter names and values.
All the Transition Action Modules are located in
Kernel/System/ProcessManagement/TransitionAction and the
following is the list of bundled Transition Actions included in this release:
DynamicFieldSet
TicketArticleCreate
TicketCreate
TicketCustomerSet
TicketLockSet
TicketOwnerSet
TicketQueueSet
TicketResponsibleSet
TicketServiceSet
TicketSLASet
TicketStateSet
TicketTitleSet
TicketTypeSet
Each module has its own and different parameters. Please review the module documentation to learn all require and optional parameters.
Note
From OTRS 4.0.1, parameters are not longer mandatory fixed values, but instead, they can inherit from the original ticket using format: <OTRS_Ticket_property>.
From OTRS 4.0.6, the format <OTRS_TICKET_property> is now supported, older format is still usable, but deprecated as it will be dropped in further versions.

After all parameters and values are set click on the submit button to save the changes.
Create the following Transitions Actions:
"Move the process ticket into the 'Management' queue" (TA1)
This action is supposed to be executed when the Transition "Approval" (T1) applied.
"Change ticket responsible to 'manager'" (TA2)
To be executed when the Transition "Approval" (T1) applied.
"Move process ticket into the 'Employees' queue" (TA3)
To be executed when:
The Transition "Approval denied" (T2) applied
The Transition "Order denied" (T4) applied
The Transition "Shipment received" (T6) applied
"Change ticket responsible to 'Employee'" (TA4)
To be executed when:
The Transition "Approval denied" (T2) applied
The Transition "Order denied" (T4) applied
The Transition "Shipment received" (T6) applied
"Move process ticket into the 'Purchasing' queue" (TA5)
To be executed when the transition "Approved" (T3) applied.
"Move process ticket into the 'Post office' queue" (TA6)
To be executed when the transition "Order placed" (T5) applied.
"Close ticket successfully" (TA7)
To be executed when:
The transition "Shipment received" (T6) applied
"Close ticket unsuccessfully" (TA8)
To be executed when:
The Transition "Approval denied" (T2) applied
The Transition "Order denied" (T4) applied
As you can see, there are places where the same Transition Actions should be executed. Therefore it is reasonable to make it possible to link Transition Actions freely with Transitions to be able to reuse them.
We chose the approach to see Activities as a basket which can contain one or more Activity Dialogs.
Click on "Activities" in the "Available Process Elements", then click on "Create New Activity".
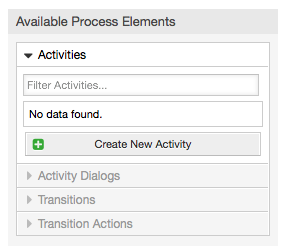
In the opened popup screen fill the "Activity Name", then drag the required Activity Dialogs from the "Available Activity Dialogs" pool, and drop them into to the "Assigned Activity Dialogs" pool. This dialogs will be presented (in the ticket zoom screen) in the same order as it is defined on this screen translating from top to bottom, from left to right.
This order is specially important in the first Activity, since the first Activity Dialog for this activity is the only one that is presented when the process starts.
Create the following Activities:
"Recording the demand" (A1)
Contains the Activity Dialog "Recording the demand" (AD1)
"Approval" (A2)
Contains the Activity Dialogs "Approval denied" (AD2) as well as "Approved" (AD3)
"Order" (A3)
Contains the Activity Dialogs "Order rejected" (AD4) as well as "Order placed" (AD5)
"Incoming" (A4)
Contains the Activity Dialog "Shipment received" (AD6)
"Process complete" (A5): This is an Activity without possible Activity Dialogs. It will be set after "Approval denied", "Order denied" or "Shipment received" and represents the end of the process.
Now we can clearly see that Activities are precisely defined states of a process ticket. After a successful Transition a process ticket moves from one Activity to another.
Let us conclude our example with the last missing piece in the puzzle, the Process as the a flow describer. In our case this is the whole ordering work-flow. Other processes could be office supply ordering or completely different processes.
The process has a starting point which consists of the start Activity and the start Activity Dialog. For any new book order, the start Activity Dialog (first Activity Dialog for the first Activity) is the first screen that is displayed. If this is completed and saved, the Process ticket will be created and can follow the configured work-flow.
The process also contains the directions for how the process ticket can move through the Process. Let's call this the "Path". It consists of the start Activity, one or more Transitions (possibly with Transition Actions), and other Activities.
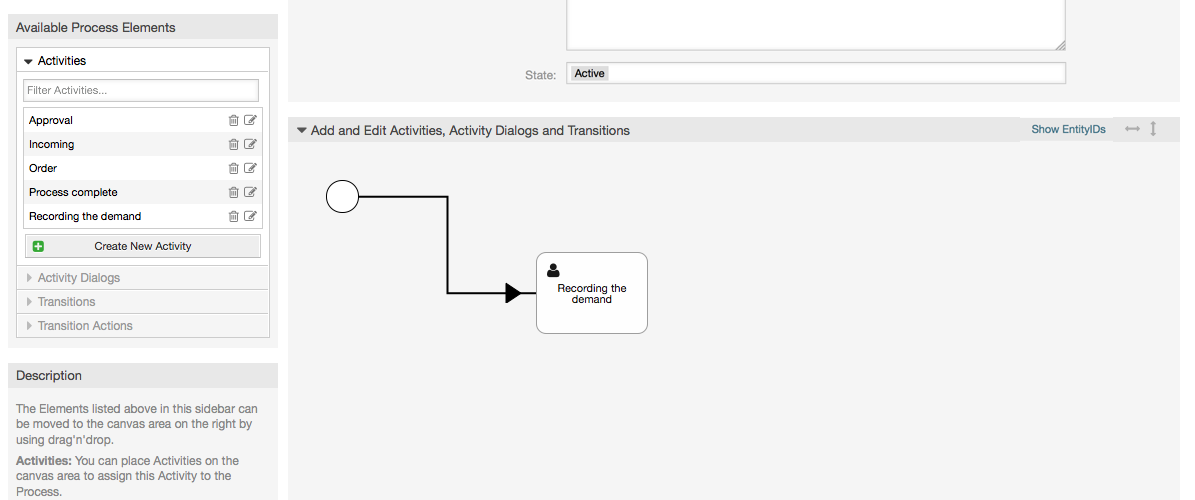
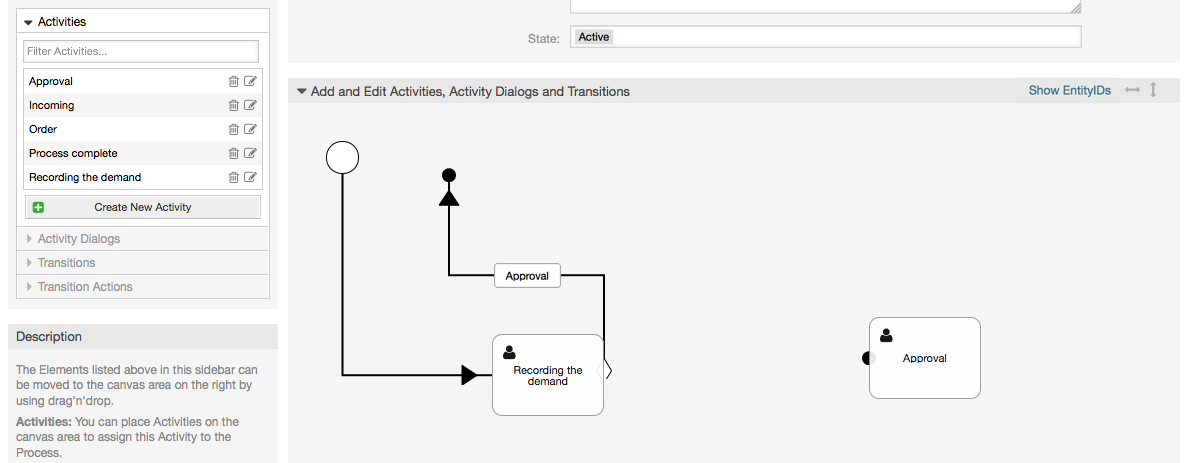
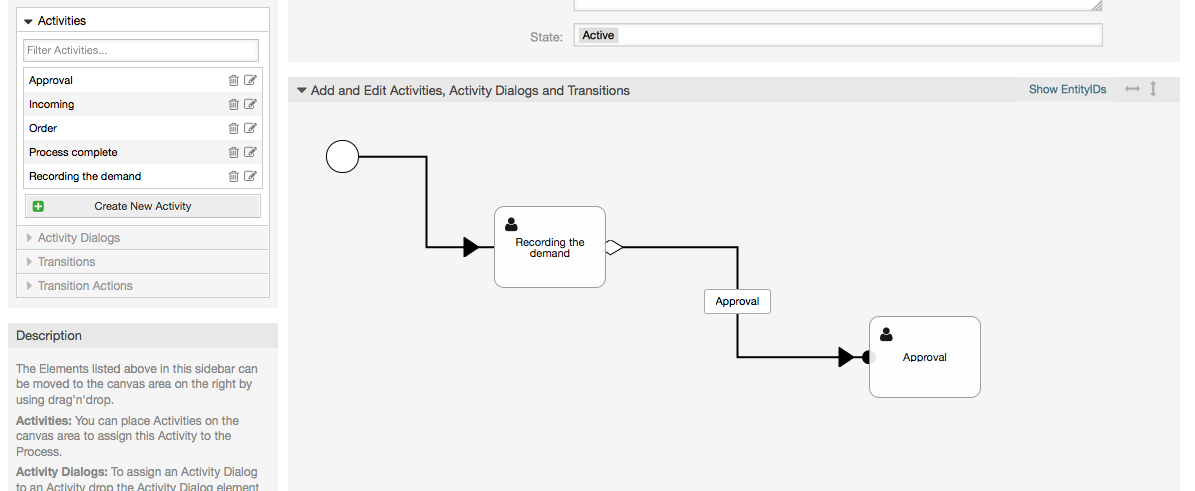
Assuming that the Activities has already assigned their Activity Dialogs drag an Activity from the accordion (in the left part of the screen) and drop it into the canvas area (below process information). Notice that an arrow from the process start (green circle) to the Activity is placed automatically. (This is the first Activity and its first Activity Dialog is the first screen that will be shown when the process starts).
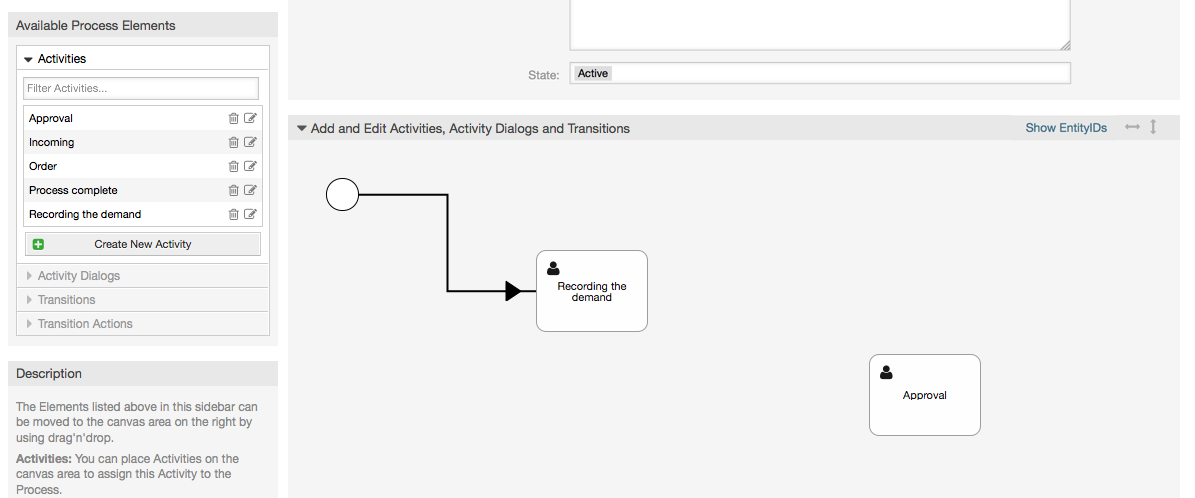
Next, drag another Activity into the canvas too. Now we will have two Activities in the canvas. The first one is connected to the start point and the second has no connections. You can hover the mouse over each activity to reveal their own Activity Dialogs.
Then let's create the "Path" (connection) between this two Activities, for this we will use the Transitions. Click on Transitions in the accordion drag a Transition and drop it inside the first Activity. Notice that the Activity changes its color indicating that the Transition is attached. As soon as the Transition is dropped the end point of the Transition arrow will be placed next to the process start point. Drag the Transition arrow end point and drop it inside the other Activity to create the connection between the Activities.
Now that the "Path" between the Actions is defined, then we need to assign the Transition Actions to the Transition, double click the Transition label (in the canvas), this will open a new popup window.
Drag the needed Transition Actions from Available Transition Actions pool and drop them into the Assigned Transition Actions pool and click on submit button.

Then back in the main process edit screen click on save button below the canvas to save all other changes.
Complete the "path" adding the following Activities, Transitions and Transition Actions:
Recording the demand until "Approval"
Starting point: Activity: "Recording the demand" (A1)
Possible Transition: "Approval" (T1)
If the condition of this activity is fulfilled, the ticket will move to Activity: "Approval" (A2)
Additionally, the following Transition Actions are executed:
"Move the process ticket into the 'Management' queue" (TA1)
"Change ticket responsible to 'manager'" (TA2)
The Activity: "Recording the demand" (A1) is a defined step of the process ticket, where there is the possibility for the Transition: "Approval" (T1). If this applies, the ticket will move to the next Activity: "Approval" (A2), and the Transition Actions: "Move the process ticket into the 'Management' queue" (TA1) and "Change ticket responsible to 'manager'" (TA2) are executed. In the Activity: "Approval" (A2), the Activity Dialogs: "Approval denied" (AD2) and "Approved" (AD3) are available.
Approval
Starting Point: Activity "Approval" (A2)
Possible Transitions:
"Approval denied" (T2)
If this matches, the process ticket will move to Activity: "Process complete" (A5).
Additionally, the following Transition Actions are executed:
"Move process ticket into the 'Employees' queue" (TA3)
"Change ticket responsible to 'Employee'" (TA4)
"Close ticket unsuccessfully" (TA8)
"Approved" (T3)
If this matches, the process ticket will move to Activity: "Order" (A3).
Additionally, the following Transition Action is executed:
"Move process ticket into the 'Purchasing' queue" (TA5)
We can see that from the current Activity, which defines a step of the process ticket, there are one or more possibilities for Transition which have exactly one target Activity (and possibly one or more Transition Actions).
Order
Starting Point: Activity "Order" (A3)
Possible Transitions:
"Order denied" (T4)
If this matches, the process ticket will move to Activity: "Process complete" (A5).
Additionally, the following Transition Actions are executed:
"Move process ticket into the 'Employees' queue" (TA3)
"Set ticket responsible to 'Employee'" (TA4)
"Close ticket unsuccessfully" (TA8)
"Order placed" (T5)
If this matches, the process ticket will move to Activity: "Incoming" (A4).
Additionally, the following Transition Action is executed:
"Move process ticket into the 'Post office' queue" (TA6)
Incoming
Starting Point: Activity "Incoming" (A4)
Possible Transitions:
"Shipment received" (T6)
If this matches, the process ticket will move to Activity: "Process complete" (A5).
Additionally, the following Transition Actions are executed:
"Move process ticket into the 'Employees' queue" (TA3)
"Set ticket responsible to 'Employee'" (TA4)
"Close ticket successfully" (TA7)
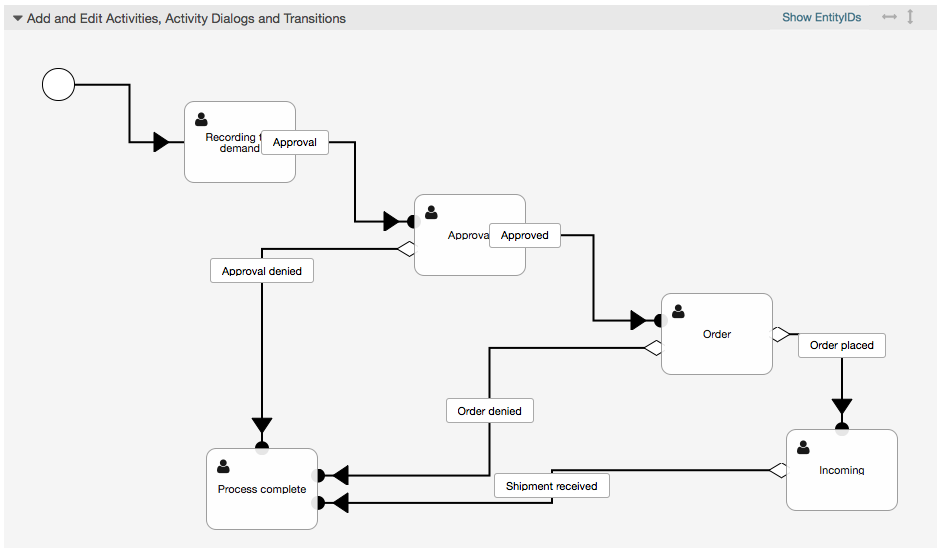
The complete Path for the book ordering Process will then look like this:
After you finish the process path please click on "Save" button in the lower part of the canvas and then click on "Synchronize All Processes" button. This will gather all processes information form the Database and create a cache file (in Perl language). This cache file is actually the processes configuration that the system will use to create or use process tickets.
Any change that is made of the process (in the GUI) will require to re-synchronize the cache file in order to get the change reflected in the system.
It is also possible to import the whole process from a YAML file, but it is still necessary to create all Dynamic Fields, Users, Queues, etc that are needed by each process before the import.
Notice that if the process requires the use of ACLs those are also needed to be set manually.
The following is the complete YAML file for the book ordering process example:
---
Activities:
  A1:
    ActivityDialogs:
      - AD1
    ChangeTime: 2012-11-23 14:49:22
    Config:
      ActivityDialog:
        1: AD1
    CreateTime: 2012-11-23 11:49:38
    EntityID: A1
    ID: 151
    Name: Recording the demand
  A2:
    ActivityDialogs:
      - AD2
      - AD3
    ChangeTime: 2012-12-13 00:55:12
    Config:
      ActivityDialog:
        1: AD2
        2: AD3
    CreateTime: 2012-11-23 11:50:11
    EntityID: A2
    ID: 152
    Name: Approval
  A3:
    ActivityDialogs:
      - AD4
      - AD5
    ChangeTime: 2012-11-23 18:12:14
    Config:
      ActivityDialog:
        1: AD4
        2: AD5
    CreateTime: 2012-11-23 11:50:35
    EntityID: A3
    ID: 153
    Name: Order
  A4:
    ActivityDialogs:
      - AD6
    ChangeTime: 2012-11-23 18:12:35
    Config:
      ActivityDialog:
        1: AD6
    CreateTime: 2012-11-23 11:51:00
    EntityID: A4
    ID: 154
    Name: Incoming
  A5:
    ActivityDialogs: []
    ChangeTime: 2012-11-23 11:51:33
    Config: {}
    CreateTime: 2012-11-23 11:51:33
    EntityID: A5
    ID: 155
    Name: Process complete
ActivityDialogs:
  AD1:
    ChangeTime: 2012-12-06 02:16:21
    Config:
      DescriptionLong: ''
      DescriptionShort: Recoding the demand
      FieldOrder:
        - DynamicField_Author
        - DynamicField_ISBN
        - DynamicField_Title
        - DynamicField_Status
      Fields:
        DynamicField_Author:
          DefaultValue: ''
          DescriptionLong: ''
          DescriptionShort: ''
          Display: 1
        DynamicField_ISBN:
          DefaultValue: ''
          DescriptionLong: ''
          DescriptionShort: ''
          Display: 1
        DynamicField_Status:
          DefaultValue: ''
          DescriptionLong: ''
          DescriptionShort: ''
          Display: 1
        DynamicField_Title:
          DefaultValue: ''
          DescriptionLong: ''
          DescriptionShort: ''
          Display: 1
      Interface:
        - AgentInterface
      Permission: ''
      RequiredLock: 0
      SubmitAdviceText: ''
      SubmitButtonText: ''
    CreateTime: 2012-11-23 14:34:43
    EntityID: AD1
    ID: 154
    Name: Recording the demand
  AD2:
    ChangeTime: 2012-11-23 14:57:41
    Config:
      DescriptionLong: ''
      DescriptionShort: Approval denied
      FieldOrder:
        - Article
        - DynamicField_Status
      Fields:
        Article:
          Config:
            CommunicationChannel:  'Internal'
            IsVisibleForCustomer: '0'
          DefaultValue: ''
          DescriptionLong: ''
          DescriptionShort: ''
          Display: 1
        DynamicField_Status:
          DefaultValue: ''
          DescriptionLong: ''
          DescriptionShort: ''
          Display: 1
      Interface:
        - AgentInterface
      Permission: ''
      RequiredLock: 0
      SubmitAdviceText: ''
      SubmitButtonText: Deny Request
    CreateTime: 2012-11-23 14:36:39
    EntityID: AD2
    ID: 155
    Name: Approval denied
  AD3:
    ChangeTime: 2012-12-14 03:14:23
    Config:
      DescriptionLong: ''
      DescriptionShort: Approved
      FieldOrder:
        - DynamicField_Status
      Fields:
        DynamicField_Status:
          DefaultValue: ''
          DescriptionLong: ''
          DescriptionShort: ''
          Display: 1
      Interface:
        - AgentInterface
      Permission: ''
      RequiredLock: 0
      SubmitAdviceText: ''
      SubmitButtonText: Approve Request
    CreateTime: 2012-11-23 14:37:35
    EntityID: AD3
    ID: 156
    Name: Approved
  AD4:
    ChangeTime: 2012-11-23 14:58:52
    Config:
      DescriptionLong: ''
      DescriptionShort: Order rejected
      FieldOrder:
        - Article
        - DynamicField_Status
      Fields:
        Article:
          Config:
            CommunicationChannel:  'Internal'
            IsVisibleForCustomer: '0'
          DefaultValue: ''
          DescriptionLong: ''
          DescriptionShort: ''
          Display: 1
        DynamicField_Status:
          DefaultValue: ''
          DescriptionLong: ''
          DescriptionShort: ''
          Display: 1
      Interface:
        - AgentInterface
      Permission: ''
      RequiredLock: 0
      SubmitAdviceText: ''
      SubmitButtonText: Reject Order
    CreateTime: 2012-11-23 14:38:48
    EntityID: AD4
    ID: 157
    Name: Order rejected
  AD5:
    ChangeTime: 2012-12-06 02:20:12
    Config:
      DescriptionLong: ''
      DescriptionShort: Order placed
      FieldOrder:
        - DynamicField_DeliveryDate
        - DynamicField_Price
        - DynamicField_Supplier
        - DynamicField_Status
      Fields:
        DynamicField_DeliveryDate:
          DefaultValue: ''
          DescriptionLong: ''
          DescriptionShort: ''
          Display: 1
        DynamicField_Price:
          DefaultValue: ''
          DescriptionLong: ''
          DescriptionShort: ''
          Display: 1
        DynamicField_Status:
          DefaultValue: ''
          DescriptionLong: ''
          DescriptionShort: ''
          Display: 1
        DynamicField_Supplier:
          DefaultValue: ''
          DescriptionLong: ''
          DescriptionShort: ''
          Display: 1
      Interface:
        - AgentInterface
      Permission: ''
      RequiredLock: 0
      SubmitAdviceText: ''
      SubmitButtonText: Place Order
    CreateTime: 2012-11-23 14:41:28
    EntityID: AD5
    ID: 158
    Name: Order placed
  AD6:
    ChangeTime: 2012-11-23 14:42:43
    Config:
      DescriptionLong: ''
      DescriptionShort: Shipment received
      FieldOrder:
        - DynamicField_DateOfReceipt
        - DynamicField_Status
      Fields:
        DynamicField_DateOfReceipt:
          DefaultValue: ''
          DescriptionLong: ''
          DescriptionShort: ''
          Display: 1
        DynamicField_Status:
          DefaultValue: ''
          DescriptionLong: ''
          DescriptionShort: ''
          Display: 1
      Interface:
        - AgentInterface
      Permission: ''
      RequiredLock: 0
      SubmitAdviceText: ''
      SubmitButtonText: ''
    CreateTime: 2012-11-23 14:42:43
    EntityID: AD6
    ID: 159
    Name: Shipment received
Process:
  Activities:
    - A1
    - A2
    - A3
    - A4
    - A5
  ChangeTime: 2012-12-06 02:31:59
  Config:
    Description: The process to order a book
    Path:
      A1:
        T1:
          ActivityEntityID: A2
          TransitionAction:
            - TA2
            - TA1
      A2:
        T2:
          ActivityEntityID: A5
          TransitionAction:
            - TA3
            - TA4
            - TA8
        T3:
          ActivityEntityID: A3
          TransitionAction:
            - TA5
      A3:
        T4:
          ActivityEntityID: A5
          TransitionAction:
            - TA3
            - TA4
            - TA8
        T5:
          ActivityEntityID: A4
          TransitionAction:
            - TA6
      A4:
        T6:
          ActivityEntityID: A5
          TransitionAction:
            - TA3
            - TA4
            - TA7
      A5: {}
    StartActivity: A1
    StartActivityDialog: AD1
  CreateTime: 2012-11-23 11:45:12
  EntityID: P1
  ID: 94
  Layout:
    A1:
      left: 172
      top: 63
    A2:
      left: 402
      top: 156
    A3:
      left: 649
      top: 255
    A4:
      left: 774
      top: 391
    A5:
      left: 194
      top: 410
  Name: Book ordering
  State: Active
  StateEntityID: S1
  TransitionActions:
    - TA1
    - TA2
    - TA3
    - TA4
    - TA8
    - TA5
    - TA3
    - TA4
    - TA8
    - TA6
    - TA3
    - TA4
    - TA7
  Transitions:
    - T1
    - T2
    - T3
    - T4
    - T5
    - T6
TransitionActions:
  TA1:
    ChangeTime: 2012-11-23 16:01:37
    Config:
      Config:
        Queue: Management
      Module: Kernel::System::ProcessManagement::TransitionAction::TicketQueueSet
    CreateTime: 2012-11-23 15:50:59
    EntityID: TA1
    ID: 61
    Name: Move the process ticket into the "Management" queue
  TA2:
    ChangeTime: 2012-11-23 16:02:12
    Config:
      Config:
        Responsible: manager
      Module: Kernel::System::ProcessManagement::TransitionAction::TicketResponsibleSet
    CreateTime: 2012-11-23 15:58:22
    EntityID: TA2
    ID: 62
    Name: Change ticket responsible to "manager"
  TA3:
    ChangeTime: 2012-11-24 14:27:02
    Config:
      Config:
        Queue: Employees
      Module: Kernel::System::ProcessManagement::TransitionAction::TicketQueueSet
    CreateTime: 2012-11-23 16:02:54
    EntityID: TA3
    ID: 63
    Name: Move the process ticket into the "Employees" queue
  TA4:
    ChangeTime: 2012-11-23 16:04:06
    Config:
      Config:
        Responsible: Employee
      Module: Kernel::System::ProcessManagement::TransitionAction::TicketResponsibleSet
    CreateTime: 2012-11-23 16:04:06
    EntityID: TA4
    ID: 64
    Name: Change ticket responsible to "Employee"
  TA5:
    ChangeTime: 2012-12-06 02:18:34
    Config:
      Config:
        Queue: Purchasing
      Module: Kernel::System::ProcessManagement::TransitionAction::TicketQueueSet
    CreateTime: 2012-11-23 16:04:54
    EntityID: TA5
    ID: 65
    Name: Move process ticket into the "Purchasing" queue
  TA6:
    ChangeTime: 2012-12-06 02:18:48
    Config:
      Config:
        Queue: Post office
      Module: Kernel::System::ProcessManagement::TransitionAction::TicketQueueSet
    CreateTime: 2012-11-23 16:06:20
    EntityID: TA6
    ID: 66
    Name: Move process ticket into the "Post office" queue
  TA7:
    ChangeTime: 2012-12-06 02:29:55
    Config:
      Config:
        State: closed successful
      Module: Kernel::System::ProcessManagement::TransitionAction::TicketStateSet
    CreateTime: 2012-12-06 02:29:27
    EntityID: TA7
    ID: 67
    Name: Close ticket successfully
  TA8:
    ChangeTime: 2012-12-06 02:31:12
    Config:
      Config:
        State: closed unsuccessful
      Module: Kernel::System::ProcessManagement::TransitionAction::TicketStateSet
    CreateTime: 2012-12-06 02:31:12
    EntityID: TA8
    ID: 68
    Name: Close ticket unsuccessfully
Transitions:
  T1:
    ChangeTime: 2012-11-23 15:12:20
    Config:
      Condition:
        1:
          Fields:
            DynamicField_Status:
              Match: Approval
              Type: String
          Type: and
      ConditionLinking: and
    CreateTime: 2012-11-23 11:53:52
    EntityID: T1
    ID: 94
    Name: Approval
  T2:
    ChangeTime: 2012-11-23 15:12:50
    Config:
      Condition:
        1:
          Fields:
            DynamicField_Status:
              Match: Approval denied
              Type: String
          Type: and
      ConditionLinking: and
    CreateTime: 2012-11-23 11:54:26
    EntityID: T2
    ID: 95
    Name: Approval denied
  T3:
    ChangeTime: 2012-11-23 15:13:29
    Config:
      Condition:
        1:
          Fields:
            DynamicField_Status:
              Match: Approved
              Type: String
          Type: and
      ConditionLinking: and
    CreateTime: 2012-11-23 11:54:54
    EntityID: T3
    ID: 96
    Name: Approved
  T4:
    ChangeTime: 2012-11-23 15:14:08
    Config:
      Condition:
        1:
          Fields:
            DynamicField_Status:
              Match: Order denied
              Type: String
          Type: and
      ConditionLinking: and
    CreateTime: 2012-11-23 11:55:25
    EntityID: T4
    ID: 97
    Name: Order denied
  T5:
    ChangeTime: 2012-11-23 18:30:33
    Config:
      Condition:
        1:
          Fields:
            DynamicField_Status:
              Match: Order placed
              Type: String
          Type: and
      ConditionLinking: and
    CreateTime: 2012-11-23 11:56:15
    EntityID: T5
    ID: 98
    Name: Order placed
  T6:
    ChangeTime: 2012-11-23 15:15:30
    Config:
      Condition:
        1:
          Fields:
            DynamicField_Status:
              Match: Shipment received
              Type: String
          Type: and
      ConditionLinking: and
    CreateTime: 2012-11-23 11:56:48
    EntityID: T6
    ID: 99
    Name: Shipment received
A Process models the path of a workflow/process. The waypoints on this path can be Activities or Transitions, we'll talk about these later.
The Process configuration can be done in the file
Kernel/Config.pm but it is strongly recommended to create
new files like Kernel/Config/Files/MyProcess.pm. Notice
that the GUI generates the file
Kernel/Config/File/ZZZProcessManagement please avoid to use
that filename, otherwise it will be overwritten when you sync processes.
Let's see an example process configuration (from process cache file):
$Self->{'Process'} = {
    'P1' => {
        Name                => 'Book order',
        CreateTime          => '16-02-2012 13:37:00',
        CreateBy            => '1',
        ChangeTime          => '17-02-2012 13:37:00',
        ChangeBy            => '1',
        State               => 'Active',
        StartActivity       => 'A1',
        StartActivityDialog => 'AD1',
        Path => {
            'A1' => {
                'T1' => {
                    ActivityEntityID => 'A2',
                },
            },
            'A2' => {
                'T2' =>  {
                    ActivityEntityID => 'A3',
                },
            },
        },
    },
    'P2' => {
        Name                => 'IT order',
        CreateTime          => '26-02-2012 13:37:00',
        CreateBy            => '1',
        ChangeTime          => '27-02-2012 13:37:00',
        ChangeBy            => '1',
        State               => 'Active',
        StartActivity       => 'A2',
        StartActivityDialog => 'AD2',
        Path => {
            'A2' => {
                'T3' => {
                    ActivityEntityID => 'A4',
                },
            },
        },
    }
};
Defines the state of a process. Possible values:
Activeall processes which can be used in new process tickets.FadeAwayare processes which cannot be selected any more for new tickets, but existing tickets still can use the process.Inactiveprocesses are deactivated and cannot be used for new or existing tickets.
When creating a new process ticket, a StartActivity must be defined. As soon as the ticket is created, this Activity will be set and used as the base for the first transition checks.
For new process tickets, a StartActivityDialog must be defined. This will be shown when creating a new process ticket (after the process was selected). At this point, the ticket does not exist yet, it will be created after submitting the StartActivityDialog.
The Path contains the structure of the Activities, and the possible Transitions between them, for the current process. And also the Transition Actions that happens when transitioning . This controls the way that a process ticket can take. Example:
'A1' => {
    'T1' => {
        ActivityEntityID => 'A2',
    },
    'T2' => {
        ActivityEntityID => 'A3',
    },
    'T3' => {
        ActivityEntityID => 'A4',
        TransitionAction => ['TA1', 'TA2'],
    },
},
If a process ticket is in Activity A1, it has three possible ways to get to
another Activity. In the Transitions T1 to T3, conditions are defined, that
a process ticket must fulfill to move (transit) to another Activity.
If in this case all the values of the process ticket and its dynamic fields that
are needed for the Transition T2 are correct, the ticket will be moved from
Activity A1 to A3. After an ActivityDialog is submitted, or any other change
is made to a ticket, it will be checked for possible Transitions from the
current Activity. If multiple Transitions are possible, the first one will be
used (based on numerical sorting of the TransitionIDs).
Additionally, it is possible to assign Transition Actions to Transitions in the Path configuration. These are modules which are executed after a successful Transition. They have to be specified in array form as in the example, we'll talk about the details later.
An Activity contains one or more Activity Dialogs and models a step in the
process. All Activity Dialogs of the current Activity are displayed in the ticket
zoom and can be used until the conditions of a Transition are fulfilled.
Let's see an example activity configuration:
$Self->{'Process::Activity'} =
{
    'A1' => {
        Name       => 'Activity 1 optional',
        CreateTime => '16-02-2012 13:37:00',
        CreateBy   => '1',
        ChangeTime => '17-02-2012 13:37:00',
        ChangeBy   => '1',
        ActivityDialog => {
            1 => 'AD1',
        },
    },
    'A2' => {
        Name       => 'Activity 2 optional',
        CreateTime => '16-02-2012 13:37:00',
        CreateBy   => '1',
        ChangeTime => '17-02-2012 13:37:00',
        ChangeBy   => '1',
        ActivityDialog => {
            1 => 'AD5',
            2 => 'AD6',
            3 => 'AD1',
        },
    },
};
An Activity Dialog is a particular screen and can be used in different Activities.
Let's see an example config:
$Self->{'Process::ActivityDialog'} = {
    'AD1' => {
        Name             => 'ActivityDialog 1 optional',
        DescriptionShort => 'Basic info',
        DescriptionLong  => 'Please insert the necessesary basic information for IT orders',
        CreateTime       => '28-02-2012 13:37:00',
        CreateBy         => '1',
        ChangeTime       => '29-02-2012 13:37:00',
        ChangeBy         => '1',
        Fields => {
            PriorityID => {
                DescriptionShort => 'Priority ID',
                DescriptionLong  => 'Enter the priority here',
                Display          => 2,
            },
        },
        FieldOrder       => [ 'PriorityID' ],
        SubmitAdviceText => 'Note: If you submit the form...',
        SubmitButtonText => 'Send request',
    },
    'AD2' => {
        Name             => 'ActivityDialog 2 optional',
        DescriptionShort => 'Basic info',
        DescriptionLong  => 'Please insert the necessesary basic information for Book orders',
        CreateTime       => '28-02-2012 13:37:00',
        CreateBy         => '1',
        ChangeTime       => '29-02-2012 13:37:00',
        ChangeBy         => '1',
        Fields => {
            StateID => {
                DescriptionShort => 'State ID',
                DescriptionLong  => 'Enter the state here',
                Display          => 2,
                DefaultValue     => '2',
            },
            Queue => {
                DescriptionShort => 'Queue ID',
                DescriptionLong  => 'Enter the queue here',
                Display          => 2,
                DefaultValue     => 'Raw',
            },
            Title => {
                DescriptionShort => 'Title',
                DescriptionLong  => 'Enter the title here',
                Display          => 1,
                DefaultValue     => 'Default Title',
            },
            DynamicField_Anzahl => {
                DescriptionShort => 'Amount',
                DescriptionLong  => 'Enter the amount here',
                Display          => 2,
                DefaultValue     => '4',
            },
        },
        FieldOrder       => [ 'DynamicField_Anzahl', 'StateID', 'Queue', 'Title' ],
        SubmitAdviceText => 'Note: If you submit the form...',
        SubmitButtonText => 'Send request',
    },
};
Contains all fields which can be displayed in this Activity Dialog. The following fields can currently be used:
    Title
    State
    StateID
    Priority
    PriorityID
    Lock
    LockID
    Queue
    QueueID
    Customer
    CustomerID
    CustomerNo
    CustomerUserID
    Owner
    OwnerID
    Type
    TypeID
    SLA
    SLAID
    Service
    ServiceID
    Responsible
    ResponsibleID
    PendingTime
    DynamicField_$FieldName  # for all dynamic fields
Example of a single field configuration:
StateID => {
    DescriptionShort => 'State ID',
    DescriptionLong  => 'Enter the state here',
    Display          => 2,
    DefaultValue     => '2',
},
The field Article is a special case. If it is present in a Fields
configuration, the Activity Dialog will contain a complete Richtext editor with
subject field and attachment handling. The entered text will then be added to
the ticket as an article. Let's see an example Article field
configuration:
Article => {
    DescriptionShort => 'Please insert your comment here.',
    DescriptionLong => '',
    Display         => 1,
    Config          => {
        CommunicationChannel => 'Internal'
        IsVisibleForCustomer => '0'
        LabelSubject => '',
        LabelBody    => '',
    },
},
Let's look at the field configuration options:
Optional longer field description that is shown then the mouse is over the field, for example advice on how to fill out the field.
Controls if the field is shown and/or mandatory. Possible values:
0: field is invisible. This can be helpful if field values should automatically be set. The configuredDefaultValuewill be stored in this case.1: field is visible, but optional.2: field is visible and mandatory. The following fields can only be invisible or mandatory:QueueID Queue State StateID Lock LockID Priority PriorityID Type TypeID
If fields are configured as optional, and no value is submitted by the user, the Default Value will be saved when the Activity Dialog is submitted by the user.
For fields with ID (like QueueID, OwnerID), this refers to the database ID
of the value. For other fields without ID (like Queue, Owner), the
DefaultValue must contain the value itself. Example:
Queue => {
    DescriptionShort => 'Queue',
    DescriptionLong  => 'Enter the queue here',
    Display          => 2,
    DefaultValue     => 'Raw',
},
Here the display order of the fields is configured. IMPORTANT: Invisible fields also must be configured here, because only configured fields will be considered when saving. Fields which are not configured will not be saved.
Optional text to be shown right above the submit button for additional help or advice text.
A Transition decides - based on configurable conditions - which path in the Process is taken, i. e. to which Activity a Process ticket can be moved.
Let's see an example:
$Self->{'Process::Transition'} = {
    'T1' => {
        Name => 'Transition 1',
        CreateTime => '14-03-2012 13:37:00', # optional
        CreateBy   => '1',                   # optional
        ChangeTime => '15-03-2012 13:37:00', # optional
        ChangeBy   => '15-03-2012 13:37:00', # optional
        Condition  => {
            Cond1  => {
                Fields => {
                    StateID => {
                        Type  => 'String',
                        Match => '1',
                    },
                },
            },
        },
    },
    'T2' => {
        Name       => 'Transition 2 optional',
        CreateTime => 'DATE',   # optional
        CreateBy   => 'USERID', # optional
        ChangeTime => 'DATE',   # optional
        ChangeBy => 'USERID',   # optional
        Condition => {
            Cond1 => {
                Queue               => 'Raw',
                DynamicField_Farbe  => '2',
                DynamicField_Anzahl => '1',
            },
        },
    },
};
Contains all conditions that are necessary for this Transition to take effect. Example:
Condition => {
    Type  => 'and',
    Cond1 => {
        Type   => 'and',
        Fields => {
            StateID => {
                Type  => 'String',
                Match => '1',
            },
            DynamicField_Marke => {
                Type  => 'String',
                Match => 'VW',
        },
    },
    Cond2 => {
        Type => 'and',
        Fields => {
            Queue => {
                Type  => 'String',
                Match => 'Raw',
            },
        },
    },
},
Let's look at the condition configuration in detail.
Specifies the way the different condition elements are connected to each other. Possible values:
and: This is the default. All conditions must be met for the transition to take effect.or: At least one condition must match.xor: Exactly one condition must match, not more.
This is the name of an example condition. It can be freely chosen. Conditions are evaluated in sorted order.
Specifies the way how the individual field tests of this condition are connected to each other. Possible values:
and: This is the default. All field tests must match for this condition to match.or: At least one field test must match.xor: Exactly one field test must match, not more.
Specifies the particular fields whose values should be tested. From our example:
Fields => {
    StateID => {
        Type  => 'String',
        Match => '1',
    },
Example of a field name. The following ticket fields can be used:
    Title
    State
    StateID
    Priority
    PriorityID
    Lock
    LockID
    Queue
    QueueID
    Customer
    CustomerID
    CustomerNo
    CustomerUserID
    Owner
    OwnerID
    Type
    TypeID
    SLA
    SLAID
    Service
    ServiceID
    Responsible
    ResponsibleID
    DynamicField_$FieldName # for all DynamicFields
When testing a field with 'ID' (like SLAID), the database ID of the field will be used for testing, for other fields (like SLA) the actual value is used for testing.
Determines the kind of field testing. Possible values:
String: Compares the field value with the string specified inMatch. Matches if they are exactly the same.Hash: Compares the field value (hash) with the hash specified inMatch. All hash values must be the same.Array: Compares the field value (array) with the array specified inMatch. Both lists must be the same.Regex: The field value can be tested with a regular expression. It is important thatMatchcontains qr{}xms as a base condition. Between the braces the actual regular expression can be noted.Module: Allows you to use a perl module for condition checking. If it returns 1, the check was positive. You can find an example module inKernel/System/ProcessManagement/TransitionValidation/ValidateDemo.pm.
Transition Actions are actions which can be triggered after successfully applied transitions (when a process ticket moves from one activity to another). These Transition Actions can be used to perform different changes on the ticket, e. g. change the Queue or the Owner of the ticket, and you can also create your own Transition Actions to perform other complex changes.
Let's see an example:
$Self->{'Process::TransitionAction'} = {
    'TA1' => {
        Name   => 'Queue Move',
        Module => 'Kernel::System::ProcessManagement::TransitionAction::TicketQueueSet',
        Config => {
            Queue  => 'Junk',
            UserID => 123,
        },
    },
};
This parameter contains all settings which are required for the module. Its content depends on the particular Transition Action module which is used. Please see the documentation of the individual modules for details. In our example, only the Queue must be specified. Nevertheless we are also sending UserID parameter, by using the UserID parameter. The transition action will be executed impersonating the user with the given UserID.
The use of UserID inside the Config parameter of a Transition Action is
accepted by all Transition Actions (since OTRS 3.2.4). In this example it could
be particularly important if the user that triggers the Transition does not have
permissions to move the ticket to the queue Junk, while the user with the
UserID 123 might have.
To use Transition Action modules multiple times, just specify several Transition Actions in your configuration. Example:
    $Self->{'Process::TransitionAction'} = {
        'TA1' => {
            Name   => 'Queue Move Junk',
            Module => 'Kernel::System::ProcessManagement::TransitionAction::TicketQueueSet',
            Config => {
                Queue => 'Junk',
            },
        },
        'TA2' => {
            Name   => 'Queue Move Raw',
            Module => 'Kernel::System::ProcessManagement::TransitionAction::TicketQueueSet',
            Config => {
                Queue => 'Raw',
            },
        },
    };
Here the same module is used to move a process ticket into the Raw queue, and
another time to move it into the junk queue. The Transition Action which must
be used for a particular Transition is determined from the Path setting of the
Process configuration.
OTRS comes with several Transition Actions that can be used in your processes. Here you can find their documentation and how they need to be configured.
Sets one or more dynamic fields at a process ticket. Example:
$Self->{'Process::TransitionAction'} = {
    'TA1' => {
        Name   => 'Set DynamicField MasterSlave to Master and Approved to 1',
        Module => 'Kernel::System::ProcessManagement::TransitionAction::DynamicFieldSet',
        Config => {
            MasterSlave => 'Master',
            Approved    => '1',

        },
    },
};
Name specifies the name of the configured TransitionAction.
MasterSlave and Approved are given as examples of DynamicField names.
The values of the fields (Master and 1) will be set by this
TransitionAction.
Creates an article, the %DataPayload parameters depends on the given communication channel, by default Internal is used. Example:
$Self->{'Process::TransitionAction'} = {
    'TA1' => {
        Name   => 'Article Create Note',
        Module => 'Kernel::System::ProcessManagement::TransitionAction::TicketArticleCreate',
        Config => {

        Config                   => {
            SenderType           => 'agent',            # (required) agent|system|customer
            IsVisibleForCustomer => 1,                  # 0 or 1
            CommunicationChannel => 'Internal',         # Internal|Phone|Email|..., default: Internal

            %DataPayload,                               # some parameters depending of each communication channel
        },
    },
};
The following is the %DataPayload for MIME based Communication channels
(Email,Internal and
Phone).
            SenderType       => 'agent',                                                # agent|system|customer
            ContentType      => 'text/plain; charset=ISO-8859-15',                      # or optional Charset & MimeType (e.g. 'text/html; charset=UTF-8')
            Subject          => 'some short description',                               # required
            Body             => 'the message text',                                     # required
            HistoryType      => 'OwnerUpdate',                                          # EmailCustomer|Move|AddNote|PriorityUpdate|WebRequestCustomer|...
            HistoryComment   => 'Some free text!',
            From             => 'Some Agent <email@example.com>',                       # not required but useful
            To               => 'Some Customer A <customer-a@example.com>',             # not required but useful
            Cc               => 'Some Customer B <customer-b@example.com>',             # not required but useful
            ReplyTo          => 'Some Customer B <customer-b@example.com>',             # not required
            InReplyTo        => '<asdasdasd.12@example.com>',                           # not required but useful
            References       => '<asdasdasd.1@example.com> <asdasdasd.12@example.com>', # not required but useful
            NoAgentNotify    => 0,                                                      # if you don't want to send agent notifications
            AutoResponseType => 'auto reply',                                           # auto reject|auto follow up|auto reply/new ticket|auto remove

            ForceNotificationToUserID   => '1,43,56',                                    # if you want to force somebody
            ExcludeNotificationToUserID => '43,56',
                 # if you want full exclude somebody from notifications,
                 # will also be removed in To: line of article,
                 # higher prio as ForceNotificationToUserID
            ExcludeMuteNotificationToUserID => '43,56',
                 # the same as ExcludeNotificationToUserID but only the
                 # sending gets muted, agent will still shown in To:
                 # line of article
Name specifies the name of the configured TransitionAction. It can be
freely chosen, but should reflect the purpose of the configured action.
SenderType defines the sender type of the article. Possible values: agent,
system, customer.
IsVisibleForCustomer defines if the article should be displayed in the customer interface.
CommunicationChannel defines the type of the article to be created. Possible
values: Email, Internal and Phone. This list could be extended by installing new communication channels via an OTRS Package.
ContentType defines the content type of the article. Possible values:
text/plain; charset=ISO-8859-15 or any other valid charset and mime type.
Subject defines the article title. Mandatory.
Body defines the article content. Mandatory.
HistoryType defines the type of the history entry. Possible values:
AddNote, ArchiveFlagUpdate, Bounce, CustomerUpdate, EmailAgent,
EmailCustomer, EscalationResponseTimeNotifyBefore,
EscalationResponseTimeStart, EscalationResponseTimeStop,
EscalationSolutionTimeNotifyBefore, EscalationSolutionTimeStart,
EscalationSolutionTimeStop, EscalationUpdateTimeNotifyBefore,
EscalationUpdateTimeStart, EscalationUpdateTimeStop, FollowUp, Forward,
Lock, LoopProtection, Merged, Misc, Move, NewTicket, OwnerUpdate,
PhoneCallAgent, PhoneCallCustomer, PriorityUpdate, Remove, ResponsibleUpdate,
SendAgentNotification, SendAnswer, SendAutoFollowUp, SendAutoReject,
SendAutoReply, SendCustomerNotification, ServiceUpdate, SetPendingTime,
SLAUpdate, StateUpdate, Subscribe, SystemRequest, TicketDynamicFieldUpdate,
TicketLinkAdd, TicketLinkDelete, TimeAccounting, TypeUpdate, Unlock,
Unsubscribe, WebRequestCustomer.
HistoryComment defines the content of the history entry.
From, To, Cc and ReplyTo take email addresses in the notation
specified above.
InReplyTo and References take email message IDs.
NoAgentNotify - if set to 1, the email notification of the Agent will not
be sent.
AutoResponseType can take the following values:
auto follow up, auto reject, auto remove, auto reply, auto reply/new ticket.
ForceNotificationToUserID, ExcludeNotificationToUserID,
ExcludeMuteNotificationToUserID can take a list of UserIDs that are
either always notified, not notified or listed as notified but not actually
sent a notification email.
Creates a ticket with an article, the new ticket can be linked with process ticket. Example:
$Self->{'Process::TransitionAction'} = {
    'TA1' => {
        Name   => 'Ticket Create',
        Module => 'Kernel::System::ProcessManagement::TransitionAction::TicketCreate',
        Config => {

            # ticket required:
            Title         => 'Some Ticket Title',
            Queue         => 'Raw',              # or QueueID => 123,
            Lock          => 'unlock',
            Priority      => '3 normal',         # or PriorityID => 2,
            State         => 'new',              # or StateID => 5,
            CustomerID    => '123465',
            CustomerUser  => 'customer@example.com',
            OwnerID       => 'someuserlogin',    # or OwnerID => 123,

            # ticket optional:
            TN              => $TicketObject->TicketCreateNumber(), # optional
            Type            => 'Incident',            # or TypeID => 1, not required
            Service         => 'Service A',           # or ServiceID => 1, not required
            SLA             => 'SLA A',               # or SLAID => 1, not required
            ResponsibleID   => 123,                   # not required
            ArchiveFlag     => 'y',                   # (y|n) not required
            PendingTime     => '2011-12-23 23:05:00', # optional (for pending states)
            PendingTimeDiff => 123 ,                  # optional (for pending states)

            # article required:
            SenderType           => 'agent',           # agent|system|customer
            CommunicationChannel => 'Internal'         # Internal|Phone|Email|..., default: Internal
            IsVisibleForCustomer => '0'

            %DataPayload,                             # some parameters depending of each communication channel

            # article optional:
            TimeUnit                        => 123

            # other:
            DynamicField_NameX => $Value,
            LinkAs => $LinkType,                                        # Normal, Parent, Child, etc. (respective original ticket)
            UserID => 123,                                              # optional, to override the UserID from the logged user
        },
    },
};
Name specifies the name of the configured TransitionAction. It can be
freely chosen, but should reflect the purpose of the configured action.
Title The ticket title.
Queue or QueueID specifies the name or id of the queue to be used in the
new ticket.
Lock or LockID sets the lock status of the ticket.
Priority or PriorityID specifies the name or id of the priority to be
used in the new ticket.
State or StateID specifies the name or id of the state to be used in
the new ticket.
CustomerID, the customer id to be set for the new ticket.
CustomerUser, the login of the customer that will be assigned in the
ticket.
OwnerID or OwnerID, specifies the login or id of the agent that will be the new ticket owner.
TN, custom number for the new ticket.
Type or TypeID specifies the name or id of the ticket type to be used in
the new ticket.
Service or ServiceID specifies the name or id of the service to be used in
the new ticket.
SLA or SLAID specifies the name or id of the SLA to be used in
the new ticket.
ResponsibleID, the ID of the agent that will be the new ticket responsible.
PendingTime, a predefined date to set the Ticket Pending Times, when the
ticket state belongs to a pending state type.
PendingTimeDiff, a dynamically date (expressed in seconds from current
date/time) to set the Ticket Pending Times, when the ticket state belongs
to a pending state type.
SenderType defines the sender type of the article. Possible values: agent,
system, customer.
IsVisibleForCustomer defines if the article should be displayed in the customer interface.
CommunicationChannel defines the type of the article to be created. Possible
values: Email, Internal and Phone. This list could be extended by installing new communication channels via an OTRS Package.
Please check the additional parameters for different article channels.
TimeUnit the time invested in the current ticket article expressed in
seconds, minutes, hours, etc.
DynamicField_NameX where DynamicField_ is a required prefix and NameX is
the name of a Dynamic Field to be set in the new ticket (on ticket level,
not article levels).
LinkAs to define the new ticket relation with originator ticket, from the
new ticket point of view, for example Normal, Parent, Child etc.
OTRS smart tags like <OTRS_CUSTOMER_BODY> or <OTRS_CUSTOMER_REALNAME> are now
supported in the Transition Action TicketCreate.
Those smart tags could be used to create a new ticket and insert data from the process ticket
to this child ticket.
The usage of the OTRS smart tags is identical to the text templates in Ticket Notifications.
Sets the customer of a process ticket. Example:
$Self->{'Process::TransitionAction'} = {
    'TA1' => {
        Name   => 'Customer Set Customer to test',
        Module => 'Kernel::System::Process::TransitionAction::TicketCustomerSet',
        Config => {
            No      => 'test',
            User    => 'client-user-123',
            # or in other words
            # CustomerID     => 'client123',
            # CustomerUserID => 'client-user-123',

        },
    },
};
Name specifies the name of the configured TransitionAction.
No or CustomerID set the Customer ID of the customer.
User or CustomerUserID set the Username of the customer.
Changes the lock of a process ticket. Example:
$Self->{'Process::TransitionAction'} = {
    'TA1' => {
        Name   => 'Set Lock to lock',
        Module => 'Kernel::System::ProcessManagement::TransitionAction::TicketLockSet',
        Config => {
            Lock   => 'lock',
            # or
            LockID => 2,
        },
    },
};
Name specifies the name of the configured TransitionAction.
Lock defines the new lock of the process ticket.
LockID defines the internal ID of the new lock.
Changes the owner of a process ticket. Example:
$Self->{'Process::TransitionAction'} = {
    'TA1' => {
        Name   => 'Owner Set root@localhost',
        Module => 'Kernel::System::ProcessManagement::TransitionAction::TicketOwnerSet',
        Config => {
            Owner => 'root@localhost',
            # or
            OwnerID => 1,
        },
    },
};
Name specifies the name of the configured TransitionAction.
Owner specifies the login name of the new owner.
OwnerID specifies the internal ID of the new owner.
Moves the ticket into a target queue. Example:
$Self->{'Process::TransitionAction'} = {
    'TA1' => {
        Name   => 'Queue Move Raw',
        Module => 'Kernel::System::ProcessManagement::TransitionAction::TicketQueueSet',
        Config => {
            Queue => 'Raw',
            # or
            # QueueID => '2',
        },
    },
};
Name specifies the name of the configured TransitionAction.
Queue specifies the name of the target queue.
QueueID specifies the internal ID of the target queue.
Changes the responsible of a process ticket. Example:
$Self->{'Process::TransitionAction'} = {
    'TA1' => {
        Name   => 'Responsible Set root@localhost',
        Module => 'Kernel::System::ProcessManagement::TransitionAction::TicketResponsibleSet',
        Config => {
            Responsible => 'root@localhost',
            # or
            ResponsibleID => 1,
        },
    },
};
Name specifies the name of the configured TransitionAction.
Responsible specifies the login name of the new responsible.
ResponsibleID specifies the internal ID of the new responsible.
Assigns a service to a process ticket. The ticket requires to have a customer and the service must be assigned to that customer. Example:
$Self->{'Process::TransitionAction'} = {
    'TA1' => {
        Name   => 'Set MyService service',
        Module => 'Kernel::System::ProcessManagement::TransitionAction::TicketServiceSet',
        Config => {
            Service   => 'MyService',
            # or
            ServiceID => 123,
        },
    },
};
Name specifies the name of the configured TransitionAction.
Service defines the new service of the process ticket. The full name is
required (e.g. GramdFatherService::FatherService::SonService ).
ServiceID defines the internal ID of the new service.
Assigns a service level agreement to a process ticket. The ticket requires to have a service and the SLA must be assigned to that service. Example:
$Self->{'Process::TransitionAction'} = {
    'TA1' => {
        Name   => 'Set MySLA SLA',
        Module => 'Kernel::System::ProcessManagement::TransitionAction::TicketSLASet',
        Config => {
            SLA   => 'MySLA',
            # or
            SLAID => 123,
        },
    },
};
Name specifies the name of the configured TransitionAction.
SLA defines the new service level agreement of the process ticket.
SLAID defines the internal ID of the new SLA.
Changes the state of a process ticket. Example:
$Self->{'Process::TransitionAction'} = {
    'TA1' => {
        Name   => 'Set State to open',
        Module => 'Kernel::System::ProcessManagement::TransitionAction::TicketStateSet',
        Config => {
            State   => 'open',
            # or
            StateID => 4,

            PendingTimeDiff => 123,
        },
    },
};
Name specifies the name of the configured TransitionAction.
State defines the new state of the process ticket.
StateID defines the internal ID of the new state.
PendingTimeDiff used only for pending type states, defines the time
difference in seconds relative (relative to the Transition Action execution
time) to set ticket pending time (e.g. 3600 means that the pending time is
1hr after the Transition Action is executed).
Sets the ticket title of a process ticket. Example:
$Self->{'Process::TransitionAction'} = {
    'TA1' => {
        Name   => 'Set Ticket Title to Ticket-title',
        Module => 'Kernel::System::ProcessManagement::TransitionAction::TicketTitleSet',
        Config => {
            Title => 'Ticket-title',
        },
    },
};
Name specifies the name of the configured TransitionAction.
Title specifies the new title of the ticket.
Sets the ticket type of a process ticket. Example:
$Self->{'Process::TransitionAction'} = {
    'TA1' => {
        Name   => 'Set Ticket Type to default',
        Module => 'Kernel::System::ProcessManagement::TransitionAction::TicketTypeSet',
        Config => {
            Type     => 'default',
            # or
            # TypeID => '1',
        },
    },
};
Name specifies the name of the configured TransitionAction.
Type specifies the name of the ticket type.
TypeID specifies the internal ID of the ticket type.
With the help of ACLs, you can limit selectable values in process tickets. Please also see the ACL reference for a description of the full ticket ACL syntax.
ACLs can only be defined in Kernel/Config.pm. Example:
$Self->{TicketAcl}->{'001-ACL-ProcessProperties'} = {
    Properties => {
        Process => {
            ProcessEntityID        => ['P1'],
            ActivityEntityID       => ['A1'],
            ActivityDialogEntityID => ['AD1'],
        }
    },
    Possible => {
        ActivityDialog => ['AD1', 'AD3'],
    },
    PossibleNot => {
        ActivityDialog => ['AD3'],
    },
};
Name of the ACL rule. For further information on ACL rules in general, please consult the ACL manual.
This is the section that is used to check if an ACL must be applied. If it has the specified values, the rule is applied. The following values can be used:
The ID of a process that the process. Matches if the ticket is assigned to this process.
Here you can specify a list of Activity Dialog IDs. This list will limit the possible Activity Dialogs that are offered to the user in the ticket zoom mask.
Possible lists the Activity Dialogs that are allowed. The setting above will
only allow AD1 and AD3 of the list of configured Activity Dialogs.
PossibleNot lists the Activity Dialogs that are not allowed. In the example
above, the setting will remove AD3 from the list of configured Activity
Dialogs.
If both Possible and PossibleNot are specified, the list of configured
Activity Dialogs will first be filtered by Possible, leaving only AD1 and
AD3 in our example. Then PossibleNot will be applied and filter out AD3,
so that only AD1 remains and is shown as a possible Activity Dialog that the
user can use.
If multiple ACL rules match, the intersection of all matching rules will be calculated to determine the possible Activity Dialogs. Example:
Configured Activity Dialogs: AD1, AD2, AD3, AD4, AD5, AD6, AD7.
$Self->{TicketAcl}->{'001-ACL-Status'} = {
    Properties => {
        Ticket => {
            Status => 'new',
        }
    },
    Possible => {
        ActivityDialog => ['AD1', 'AD2', 'AD3', 'AD6', 'AD7'],
    },
};
$Self->{TicketAcl}->{'002-ACL-Queue'} = {
    Properties => {
        Ticket => {
            Queue => ['Raw']
        }
    },
    Possible => {
        ActivityDialog => ['AD2', 'AD3', 'AD4', 'AD7'],
    },
};
$Self->{TicketAcl}->{'003-ACL-Priority'} = {
    Properties => {
        Ticket => {
            Priority => ['3 normal']
        }
    },
    PossibleNot => {
        ActivityDialog => ['AD3', 'AD4'],
    },
};
If a process ticket has the state new, is in the Raw queue and has a
priority 3 normal, then all three ACL rules will match.
The first rule reduces the Activity Dialogs from AD1, AD2, AD3, AD4,
AD5, AD6, AD7 to AD1, AD2, AD3, AD6, AD7 and forbids AD4 and
AD5.
The second rule will now further reduce the remaining Activity Dialogs.
In our example, AD2, AD3, AD7 will remain.
Now the third rule will further reduce the list by PossibleNot.
AD3 is removed from the list. AD4 is not removed, since it was not on the
list in the first place. At the end, AD2 and AD7 remain as possible Activity
Dialogs that the user can utilize.
It is also possible to limit the processes that can be displayed in the New
process ticket screen. The functionality is similar to limiting the
Activity Dialogs with one exception: The ACLs could only be based on Users.
See examples below:
$Self->{TicketAcl}->{'200-ACL-Process'} = {
    # match properties
    Properties => {
        User => {
            UserID => [2, 3],
        },
    },
    Possible => {
       Process => ['P1', 'P2', 'P3'],
    },
    PossibleNot => {
        Process => ['P4'],
    },
};
$Self->{TicketAcl}->{'201-ACL-Process'} = {
    # match properties
    Properties => {
        User => {
            Group_rw => [ 'MyGroup' ],
        },
    },
    Possible => {
       Process => ['P1', 'P2', 'P3'],
    },
    PossibleNot => {
        Process => ['P4'],
    },
};
$Self->{TicketAcl}->{'202-ACL-Process'} = {
    # match properties
    Properties => {
        User => {
            Role => [ 'MyRole' ],
        },
    },
    Possible => {
       Process => ['P1', 'P2', 'P3'],
    },
    PossibleNot => {
        Process => ['P4'],
    },
};
On the AdminProcessManagement screen you can find an Ready2Adopt Processes widget, where you can find best practice Ready2Adopt processes. Currently, there is only an Application for leave process available, but you can find additional Ready2Adopt processes in the OTRS Business Solution™.
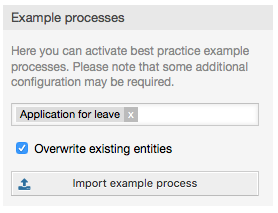
Select process from the drop-down menu and click on the Import Ready2Adopt process button. After the process is imported, don't forget to deploy changes.